Tạo CloudFront distribution
-
Tại trang CloudFront.
- Click nút Create a CloudFront distribution.

- Tại trang Create distribution.
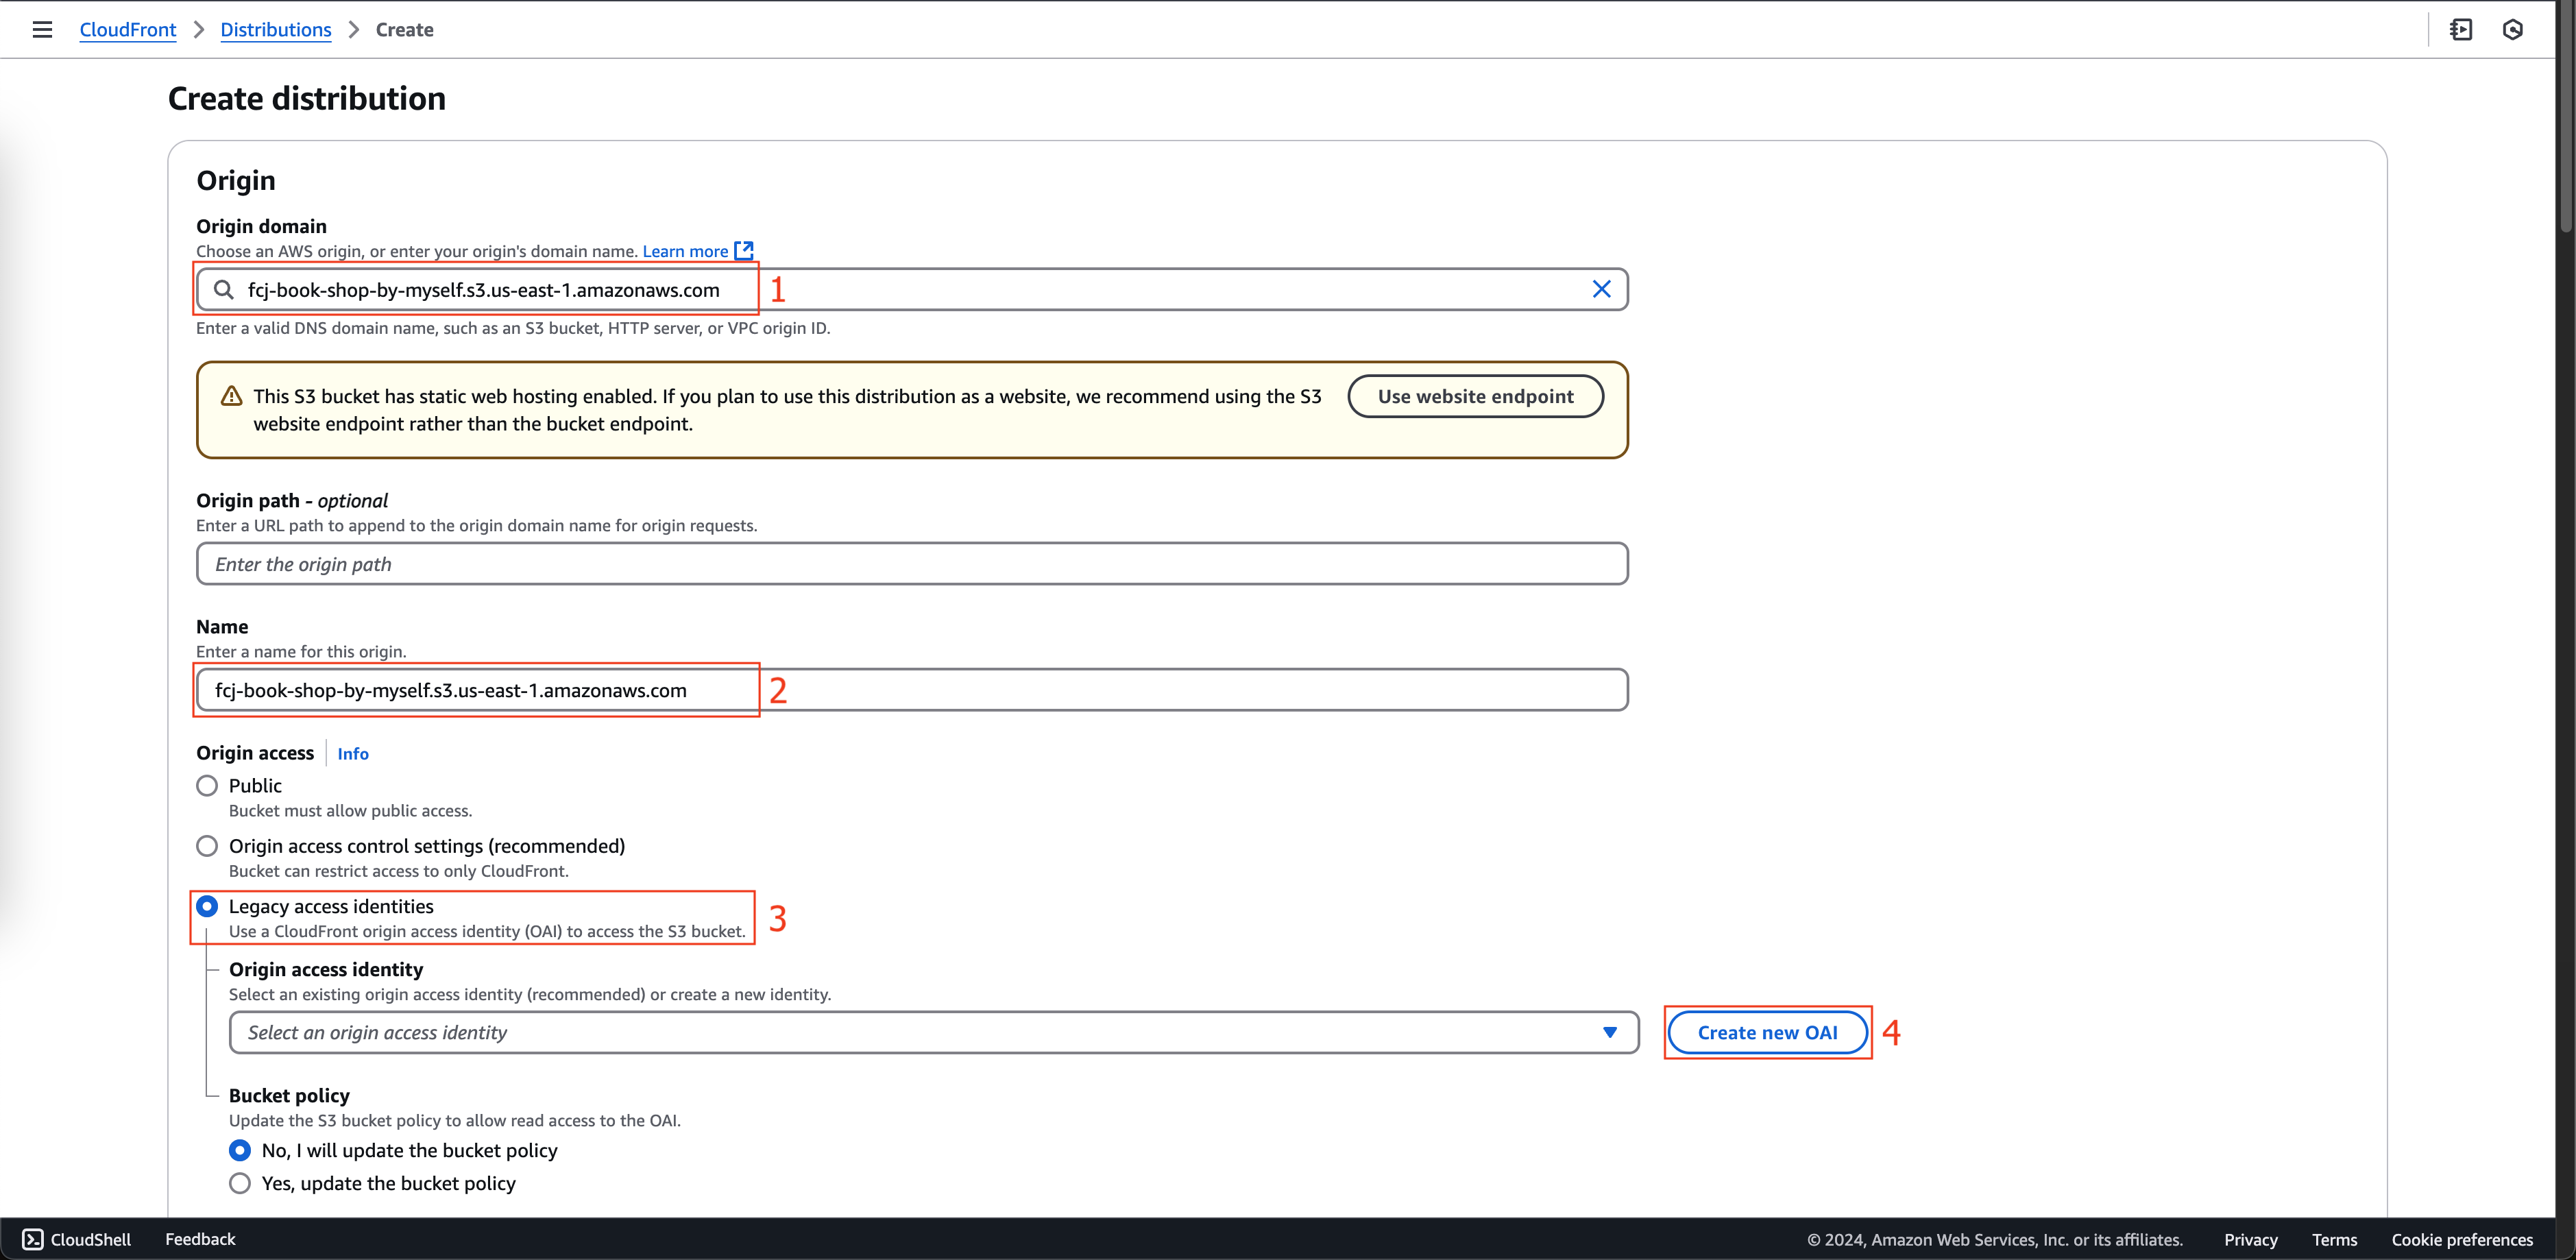
- Chọn fcj-book-shop-by-myself.s3.us-east-1.amazonaws.com tại Origin domain.
- Nhập
fcj-book-shop-by-myself.s3.us-east-1.amazonaws.comtại Name. - Chọn Legacy access identities.
- Click Create new OAI.
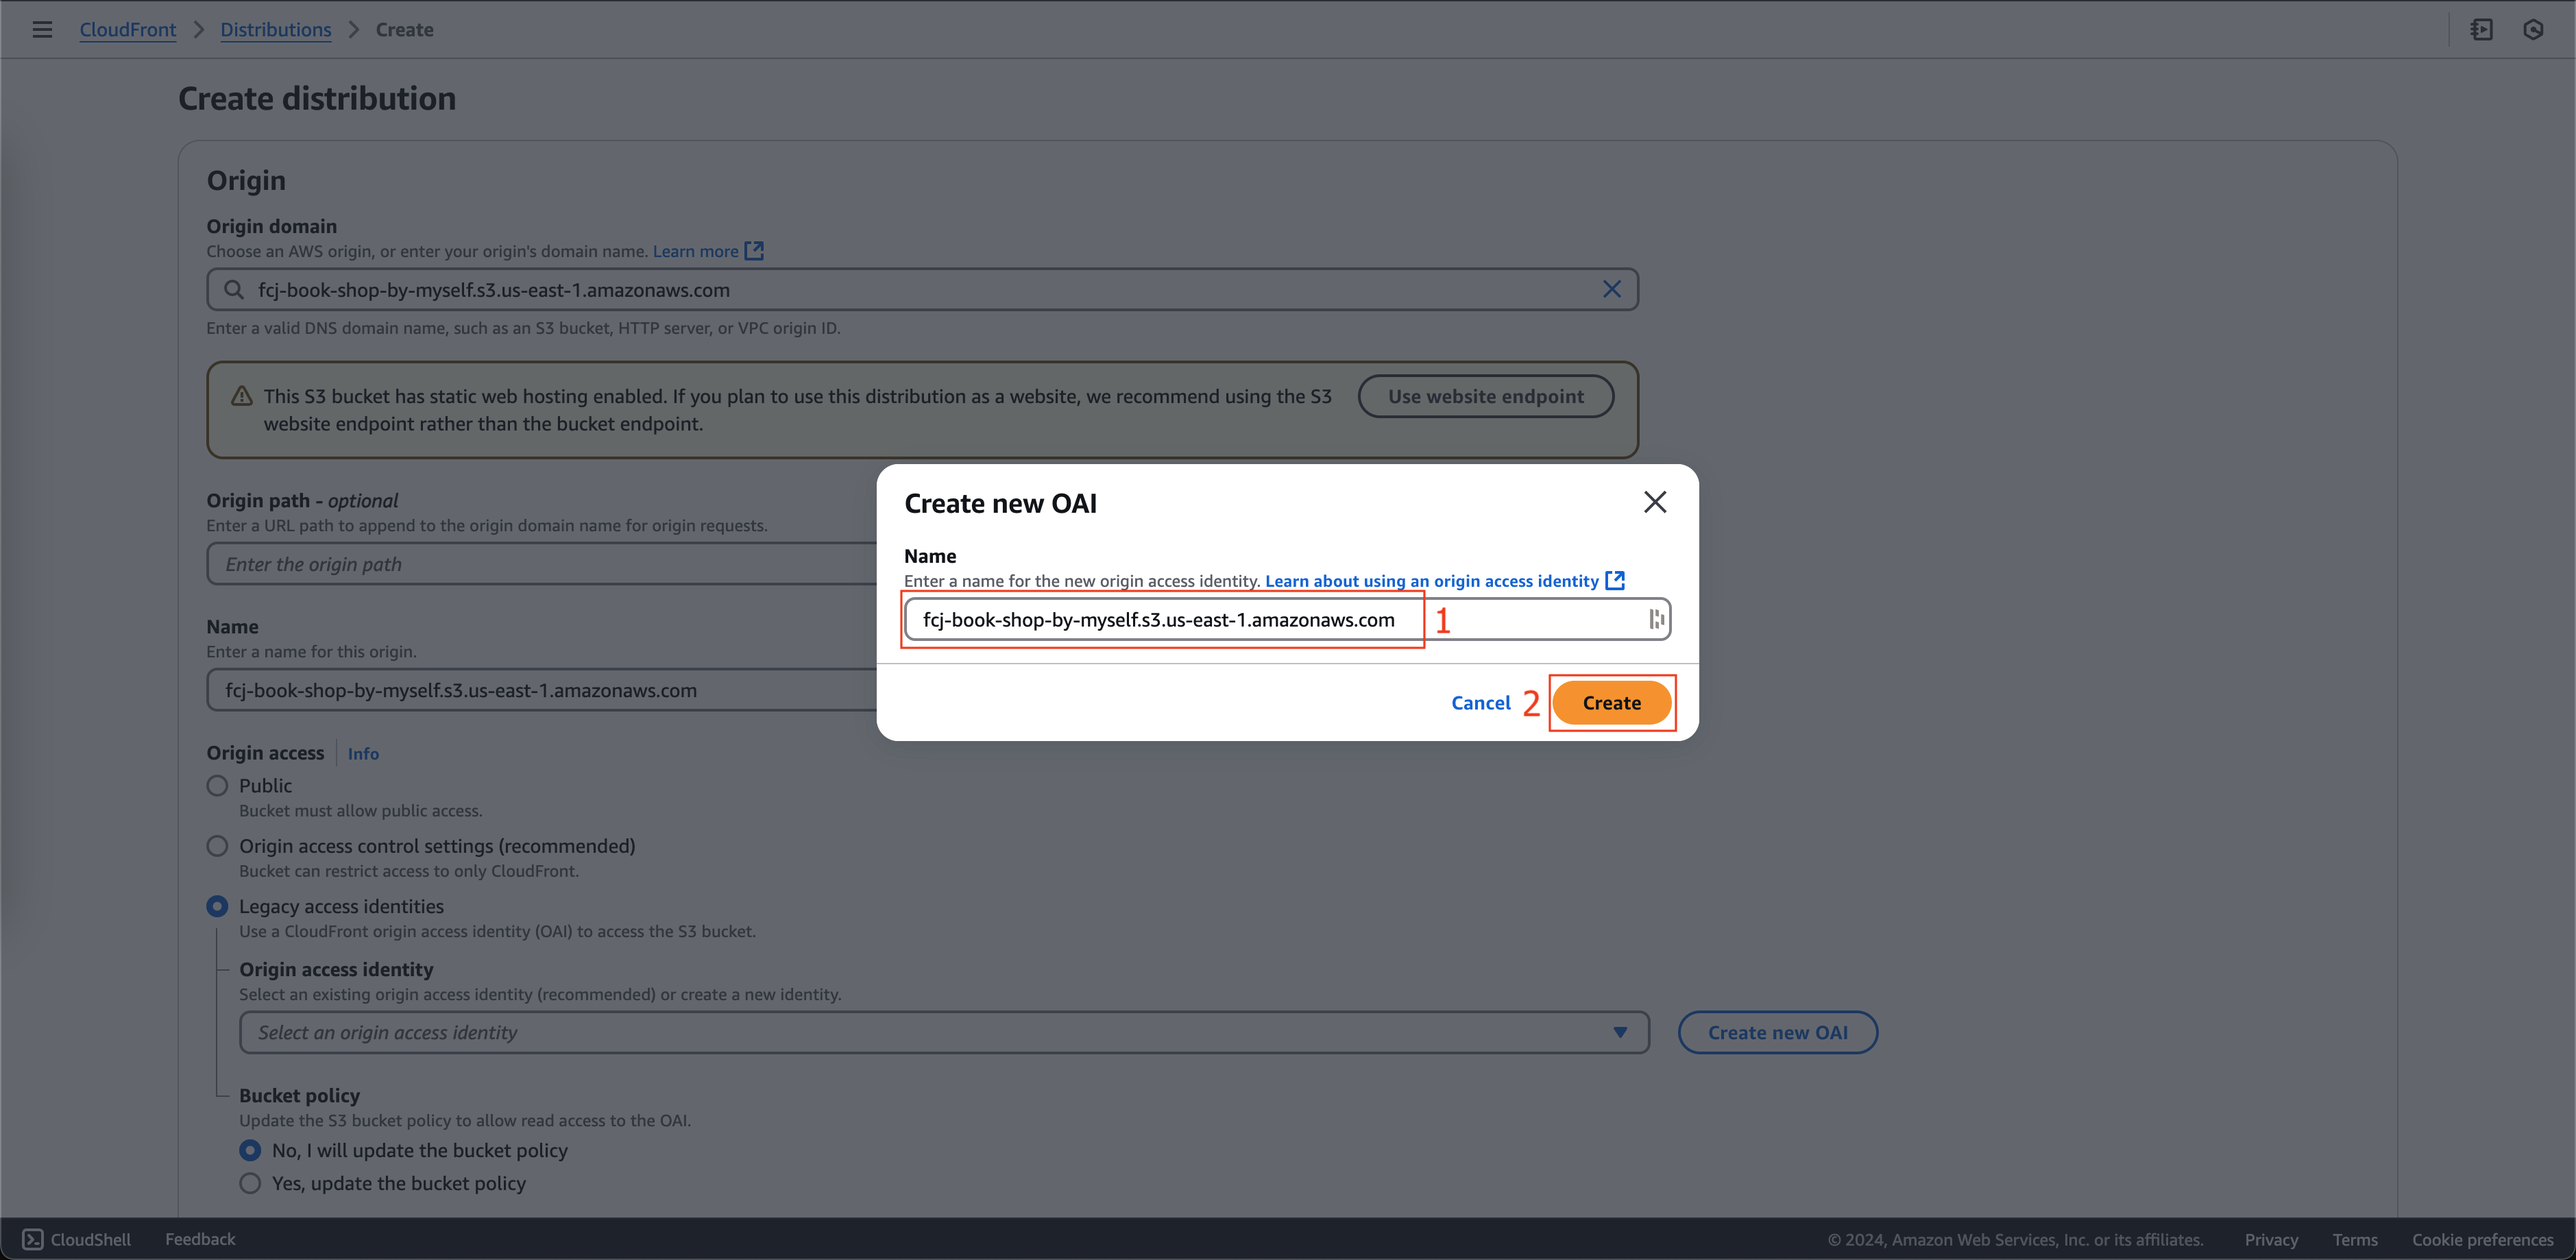
- Tại popup Create new OAI.
- Nhập fcj-book-shop-by-myself.s3.us-east-1.amazonaws.com tại Name.
- Click nút Create.
- Tại trang Create distribution.
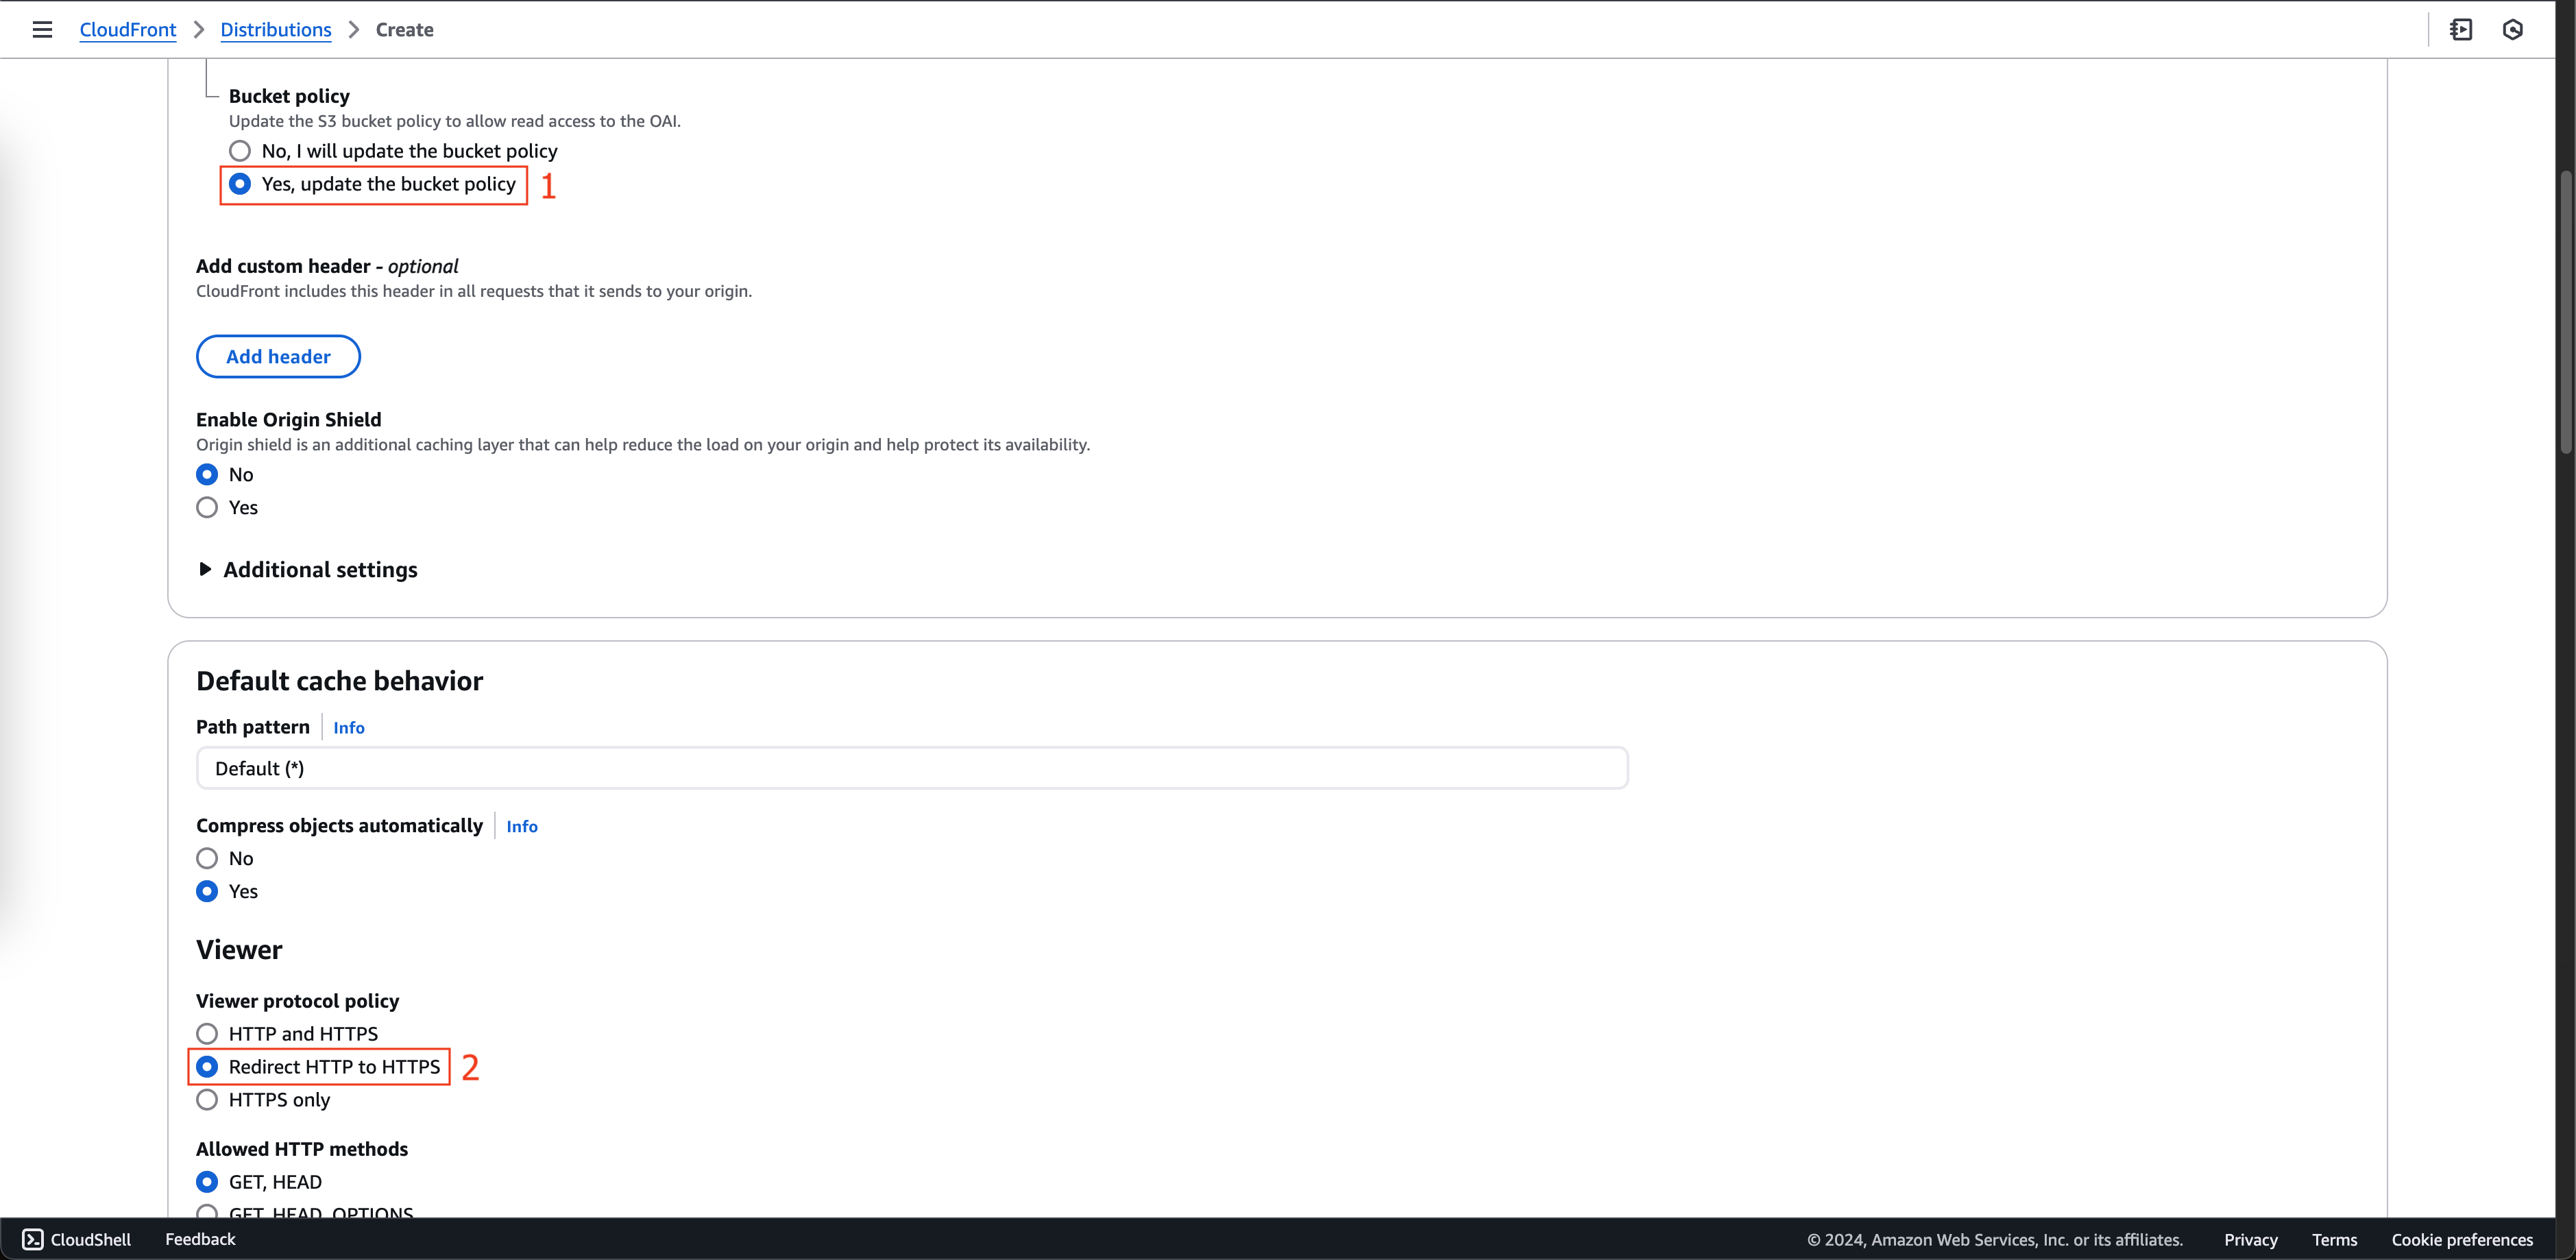
- Cuộn xuống, chọn Yes, update the bucket policy tại Bucket policy.
- Chọn Redirect HTTP to HTTPS tại Viewer protocol policy.
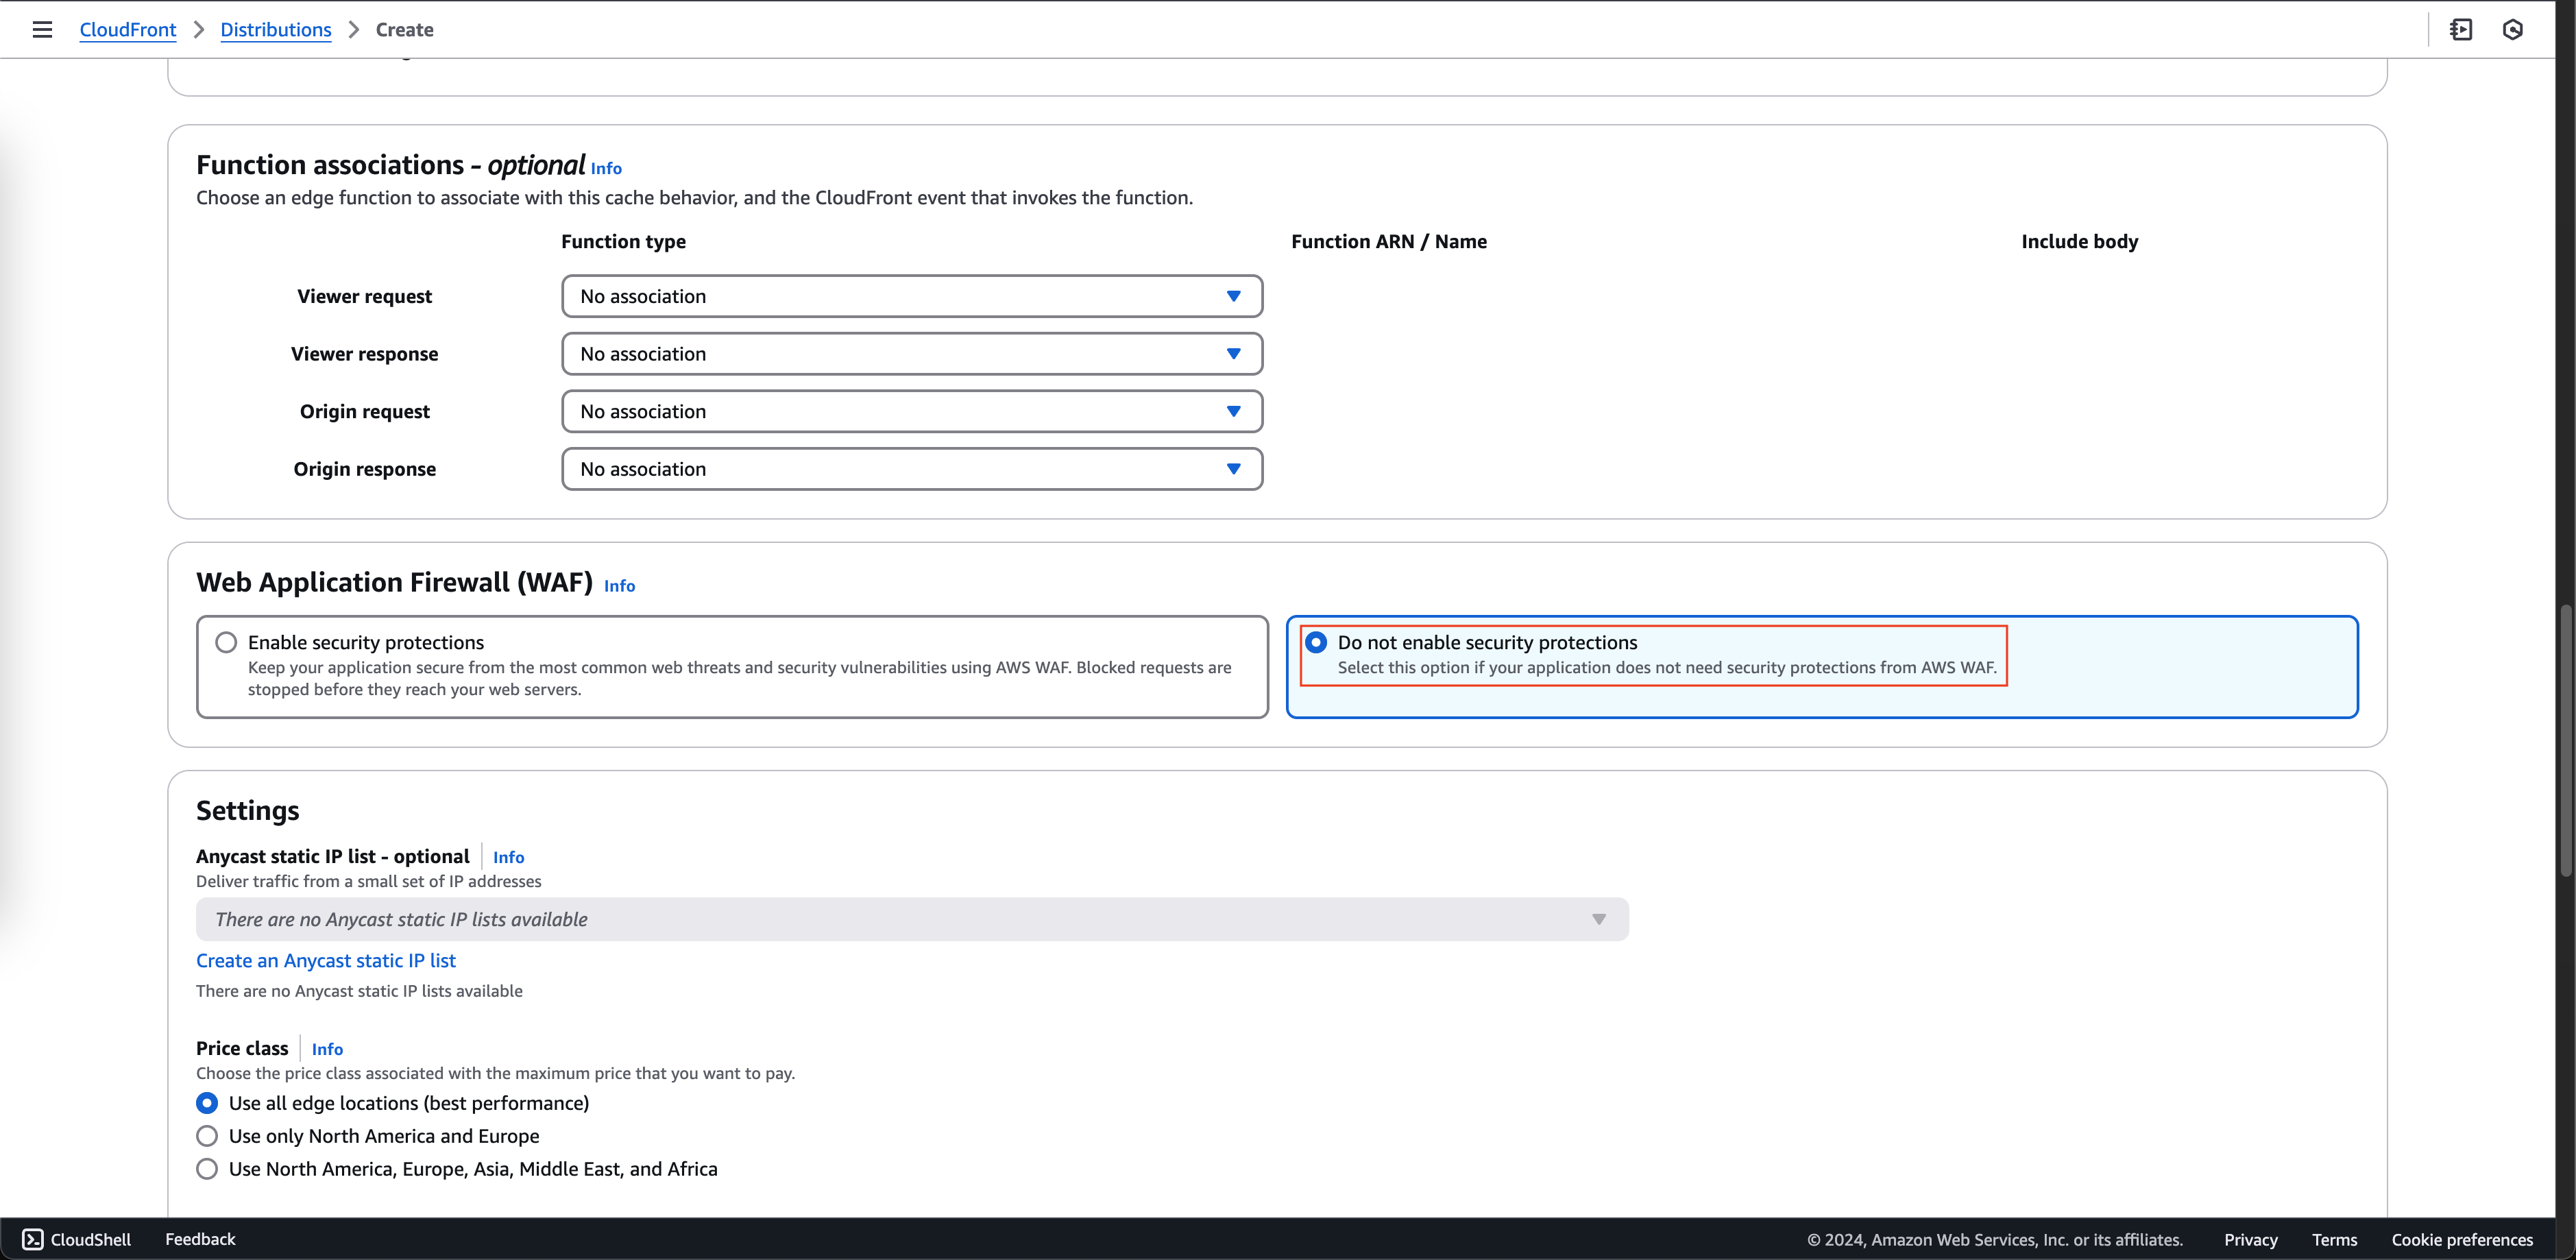
- Cuộn xuống, chọn Do not enable security protections tại Web Application Firewall (WAF).
- Cuộn xuống, click nút Add item tại Alternate domain name (CNAME).
- Nhập <www.chaunguyen.site>.
- Nhập chaunguyen.site.
- Chọn chứng chỉ *.chaunguyen.site (…) mà bạn đã tạo trước đó.
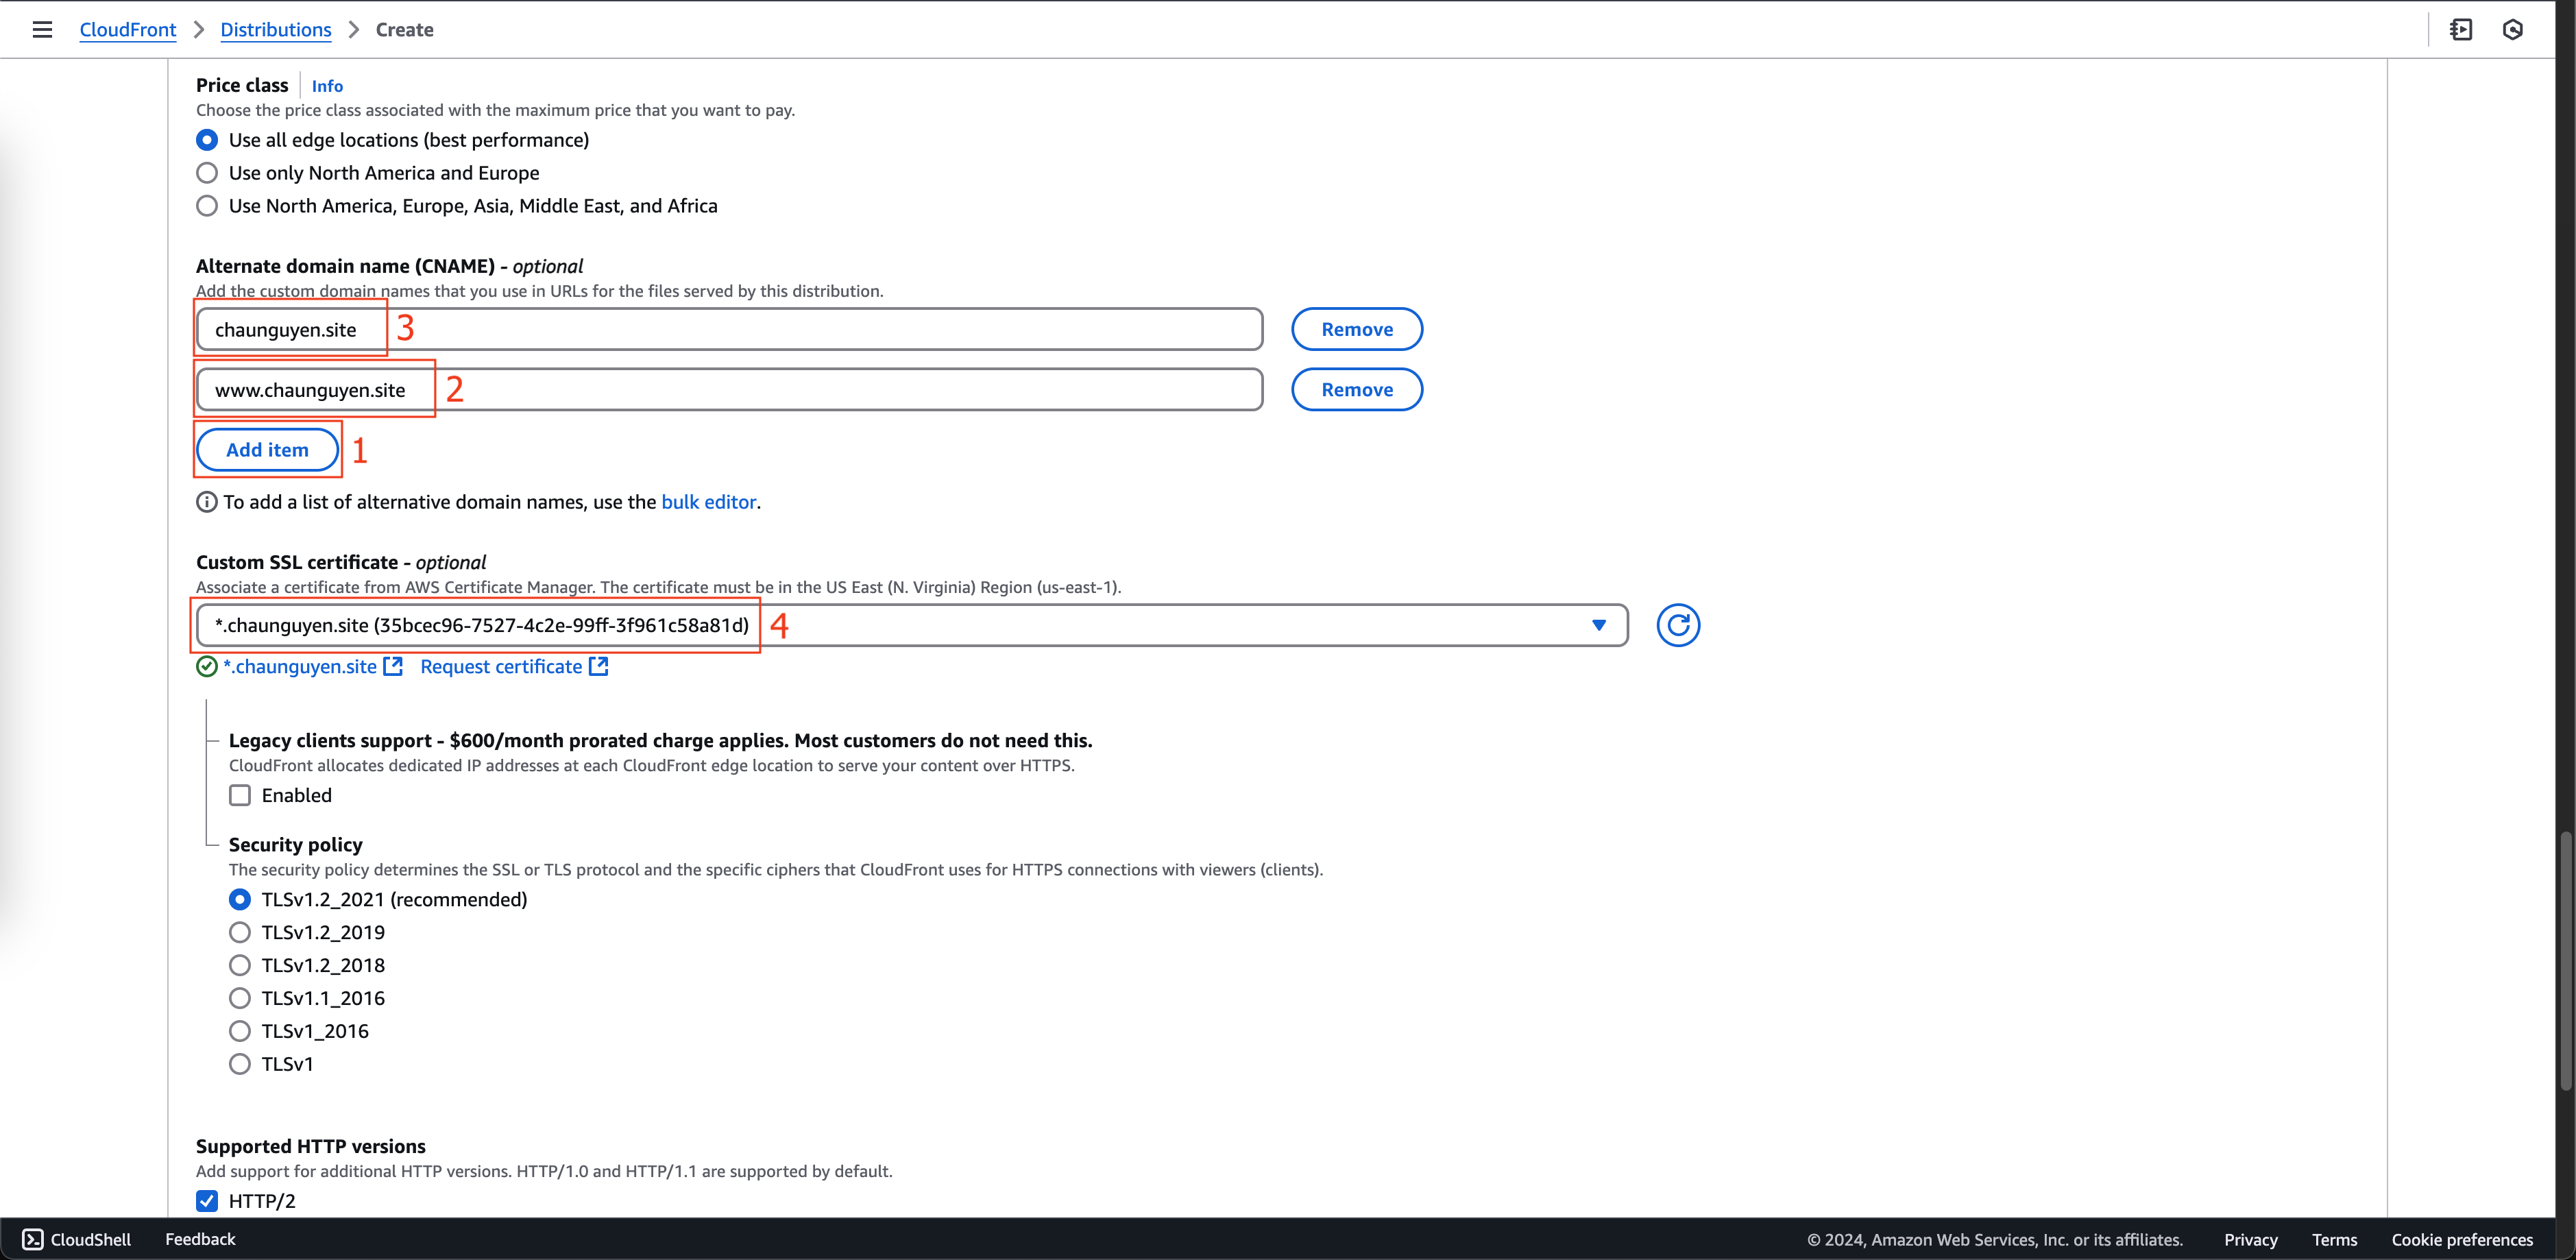
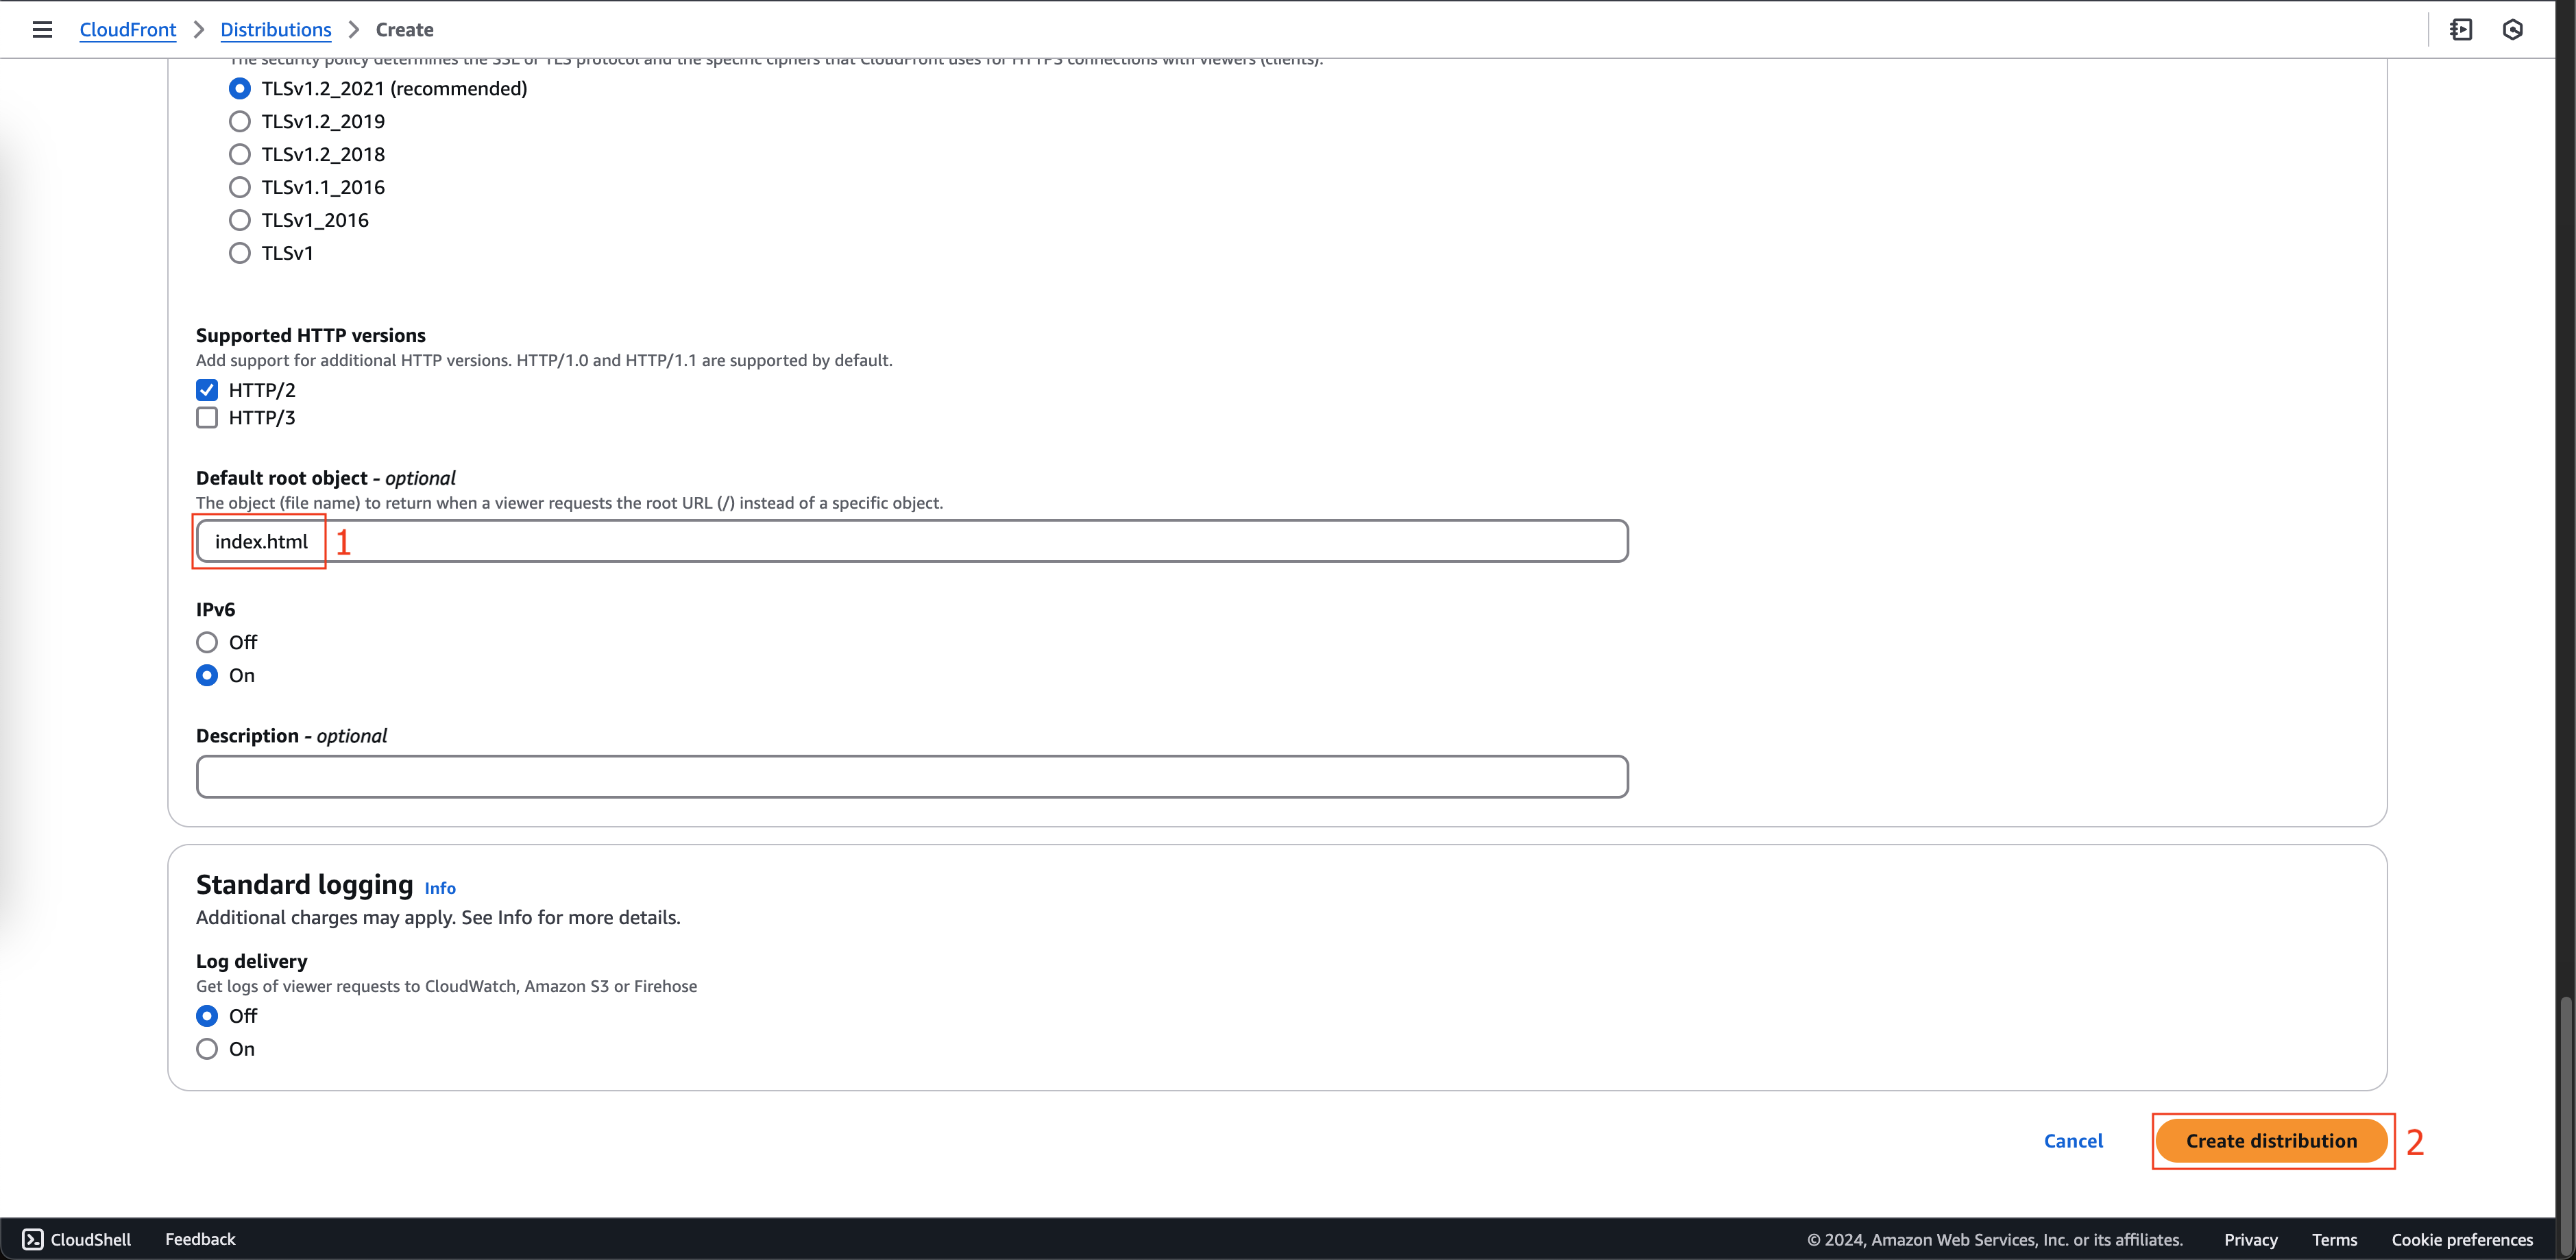
- Cuộn xuống cuối trang, nhập index.html tại Default root object.
- Click nút Create distribution.
- Click nút Create a CloudFront distribution.
-
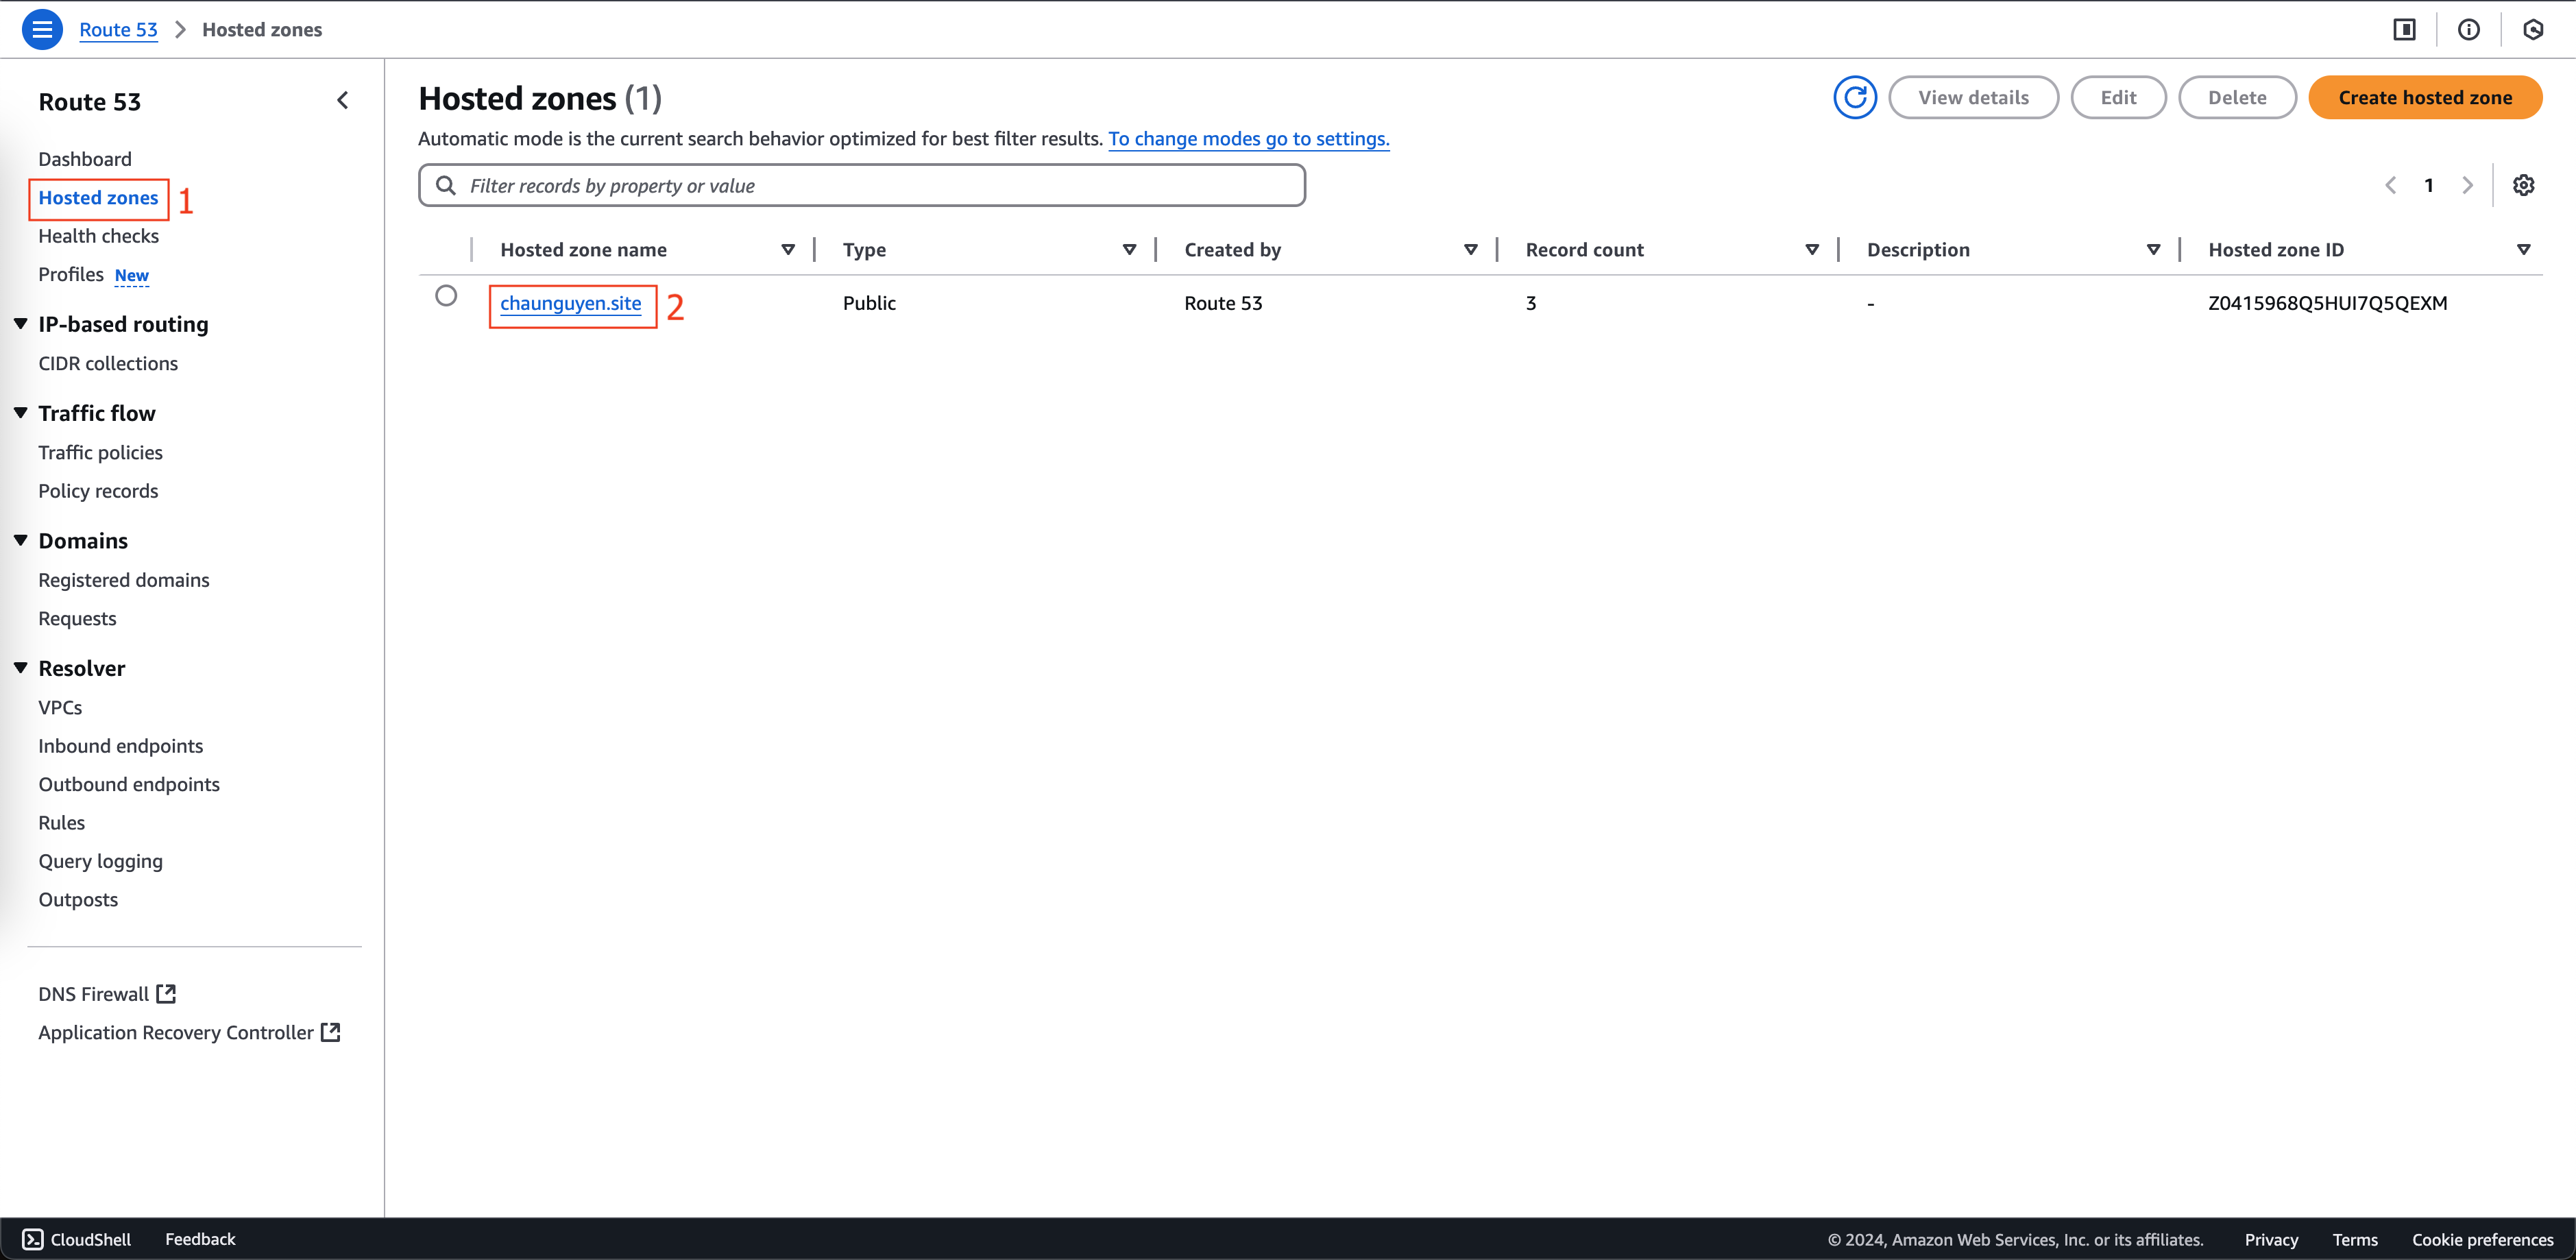
Mở Amazon Route 53.
- Click Hosted zones ở menu bên trái.
- Chọn chaunguyen.site.
- Tại trang chaunguyen.site.
- Click nút Create record.
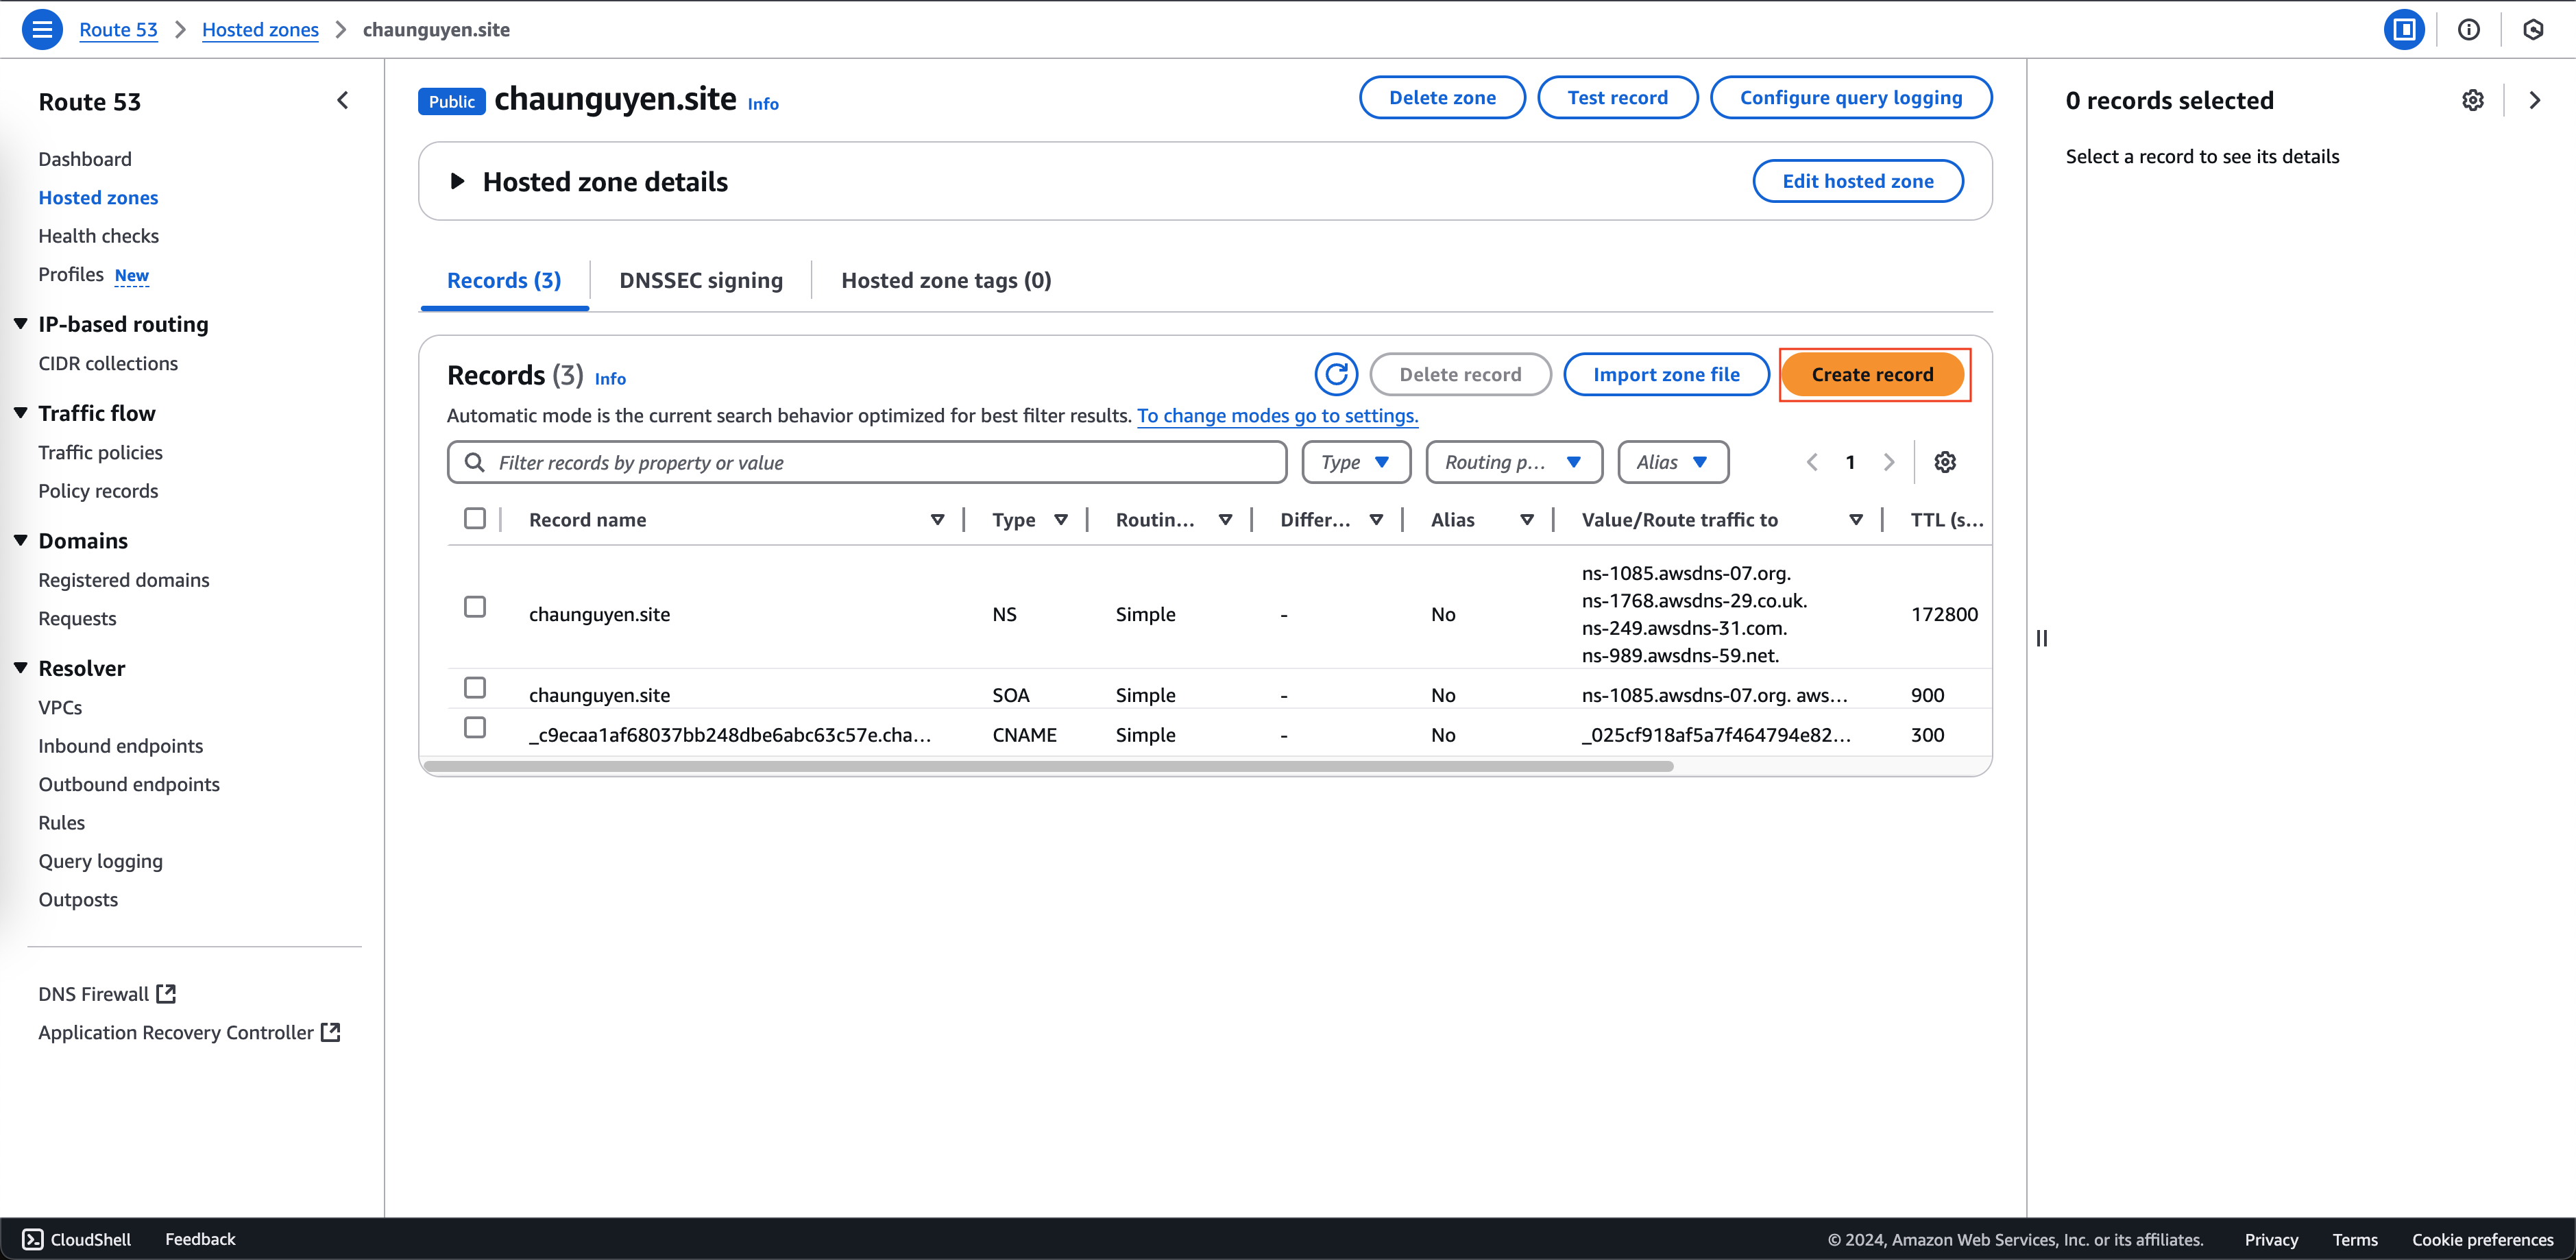
- Click nút Create record.
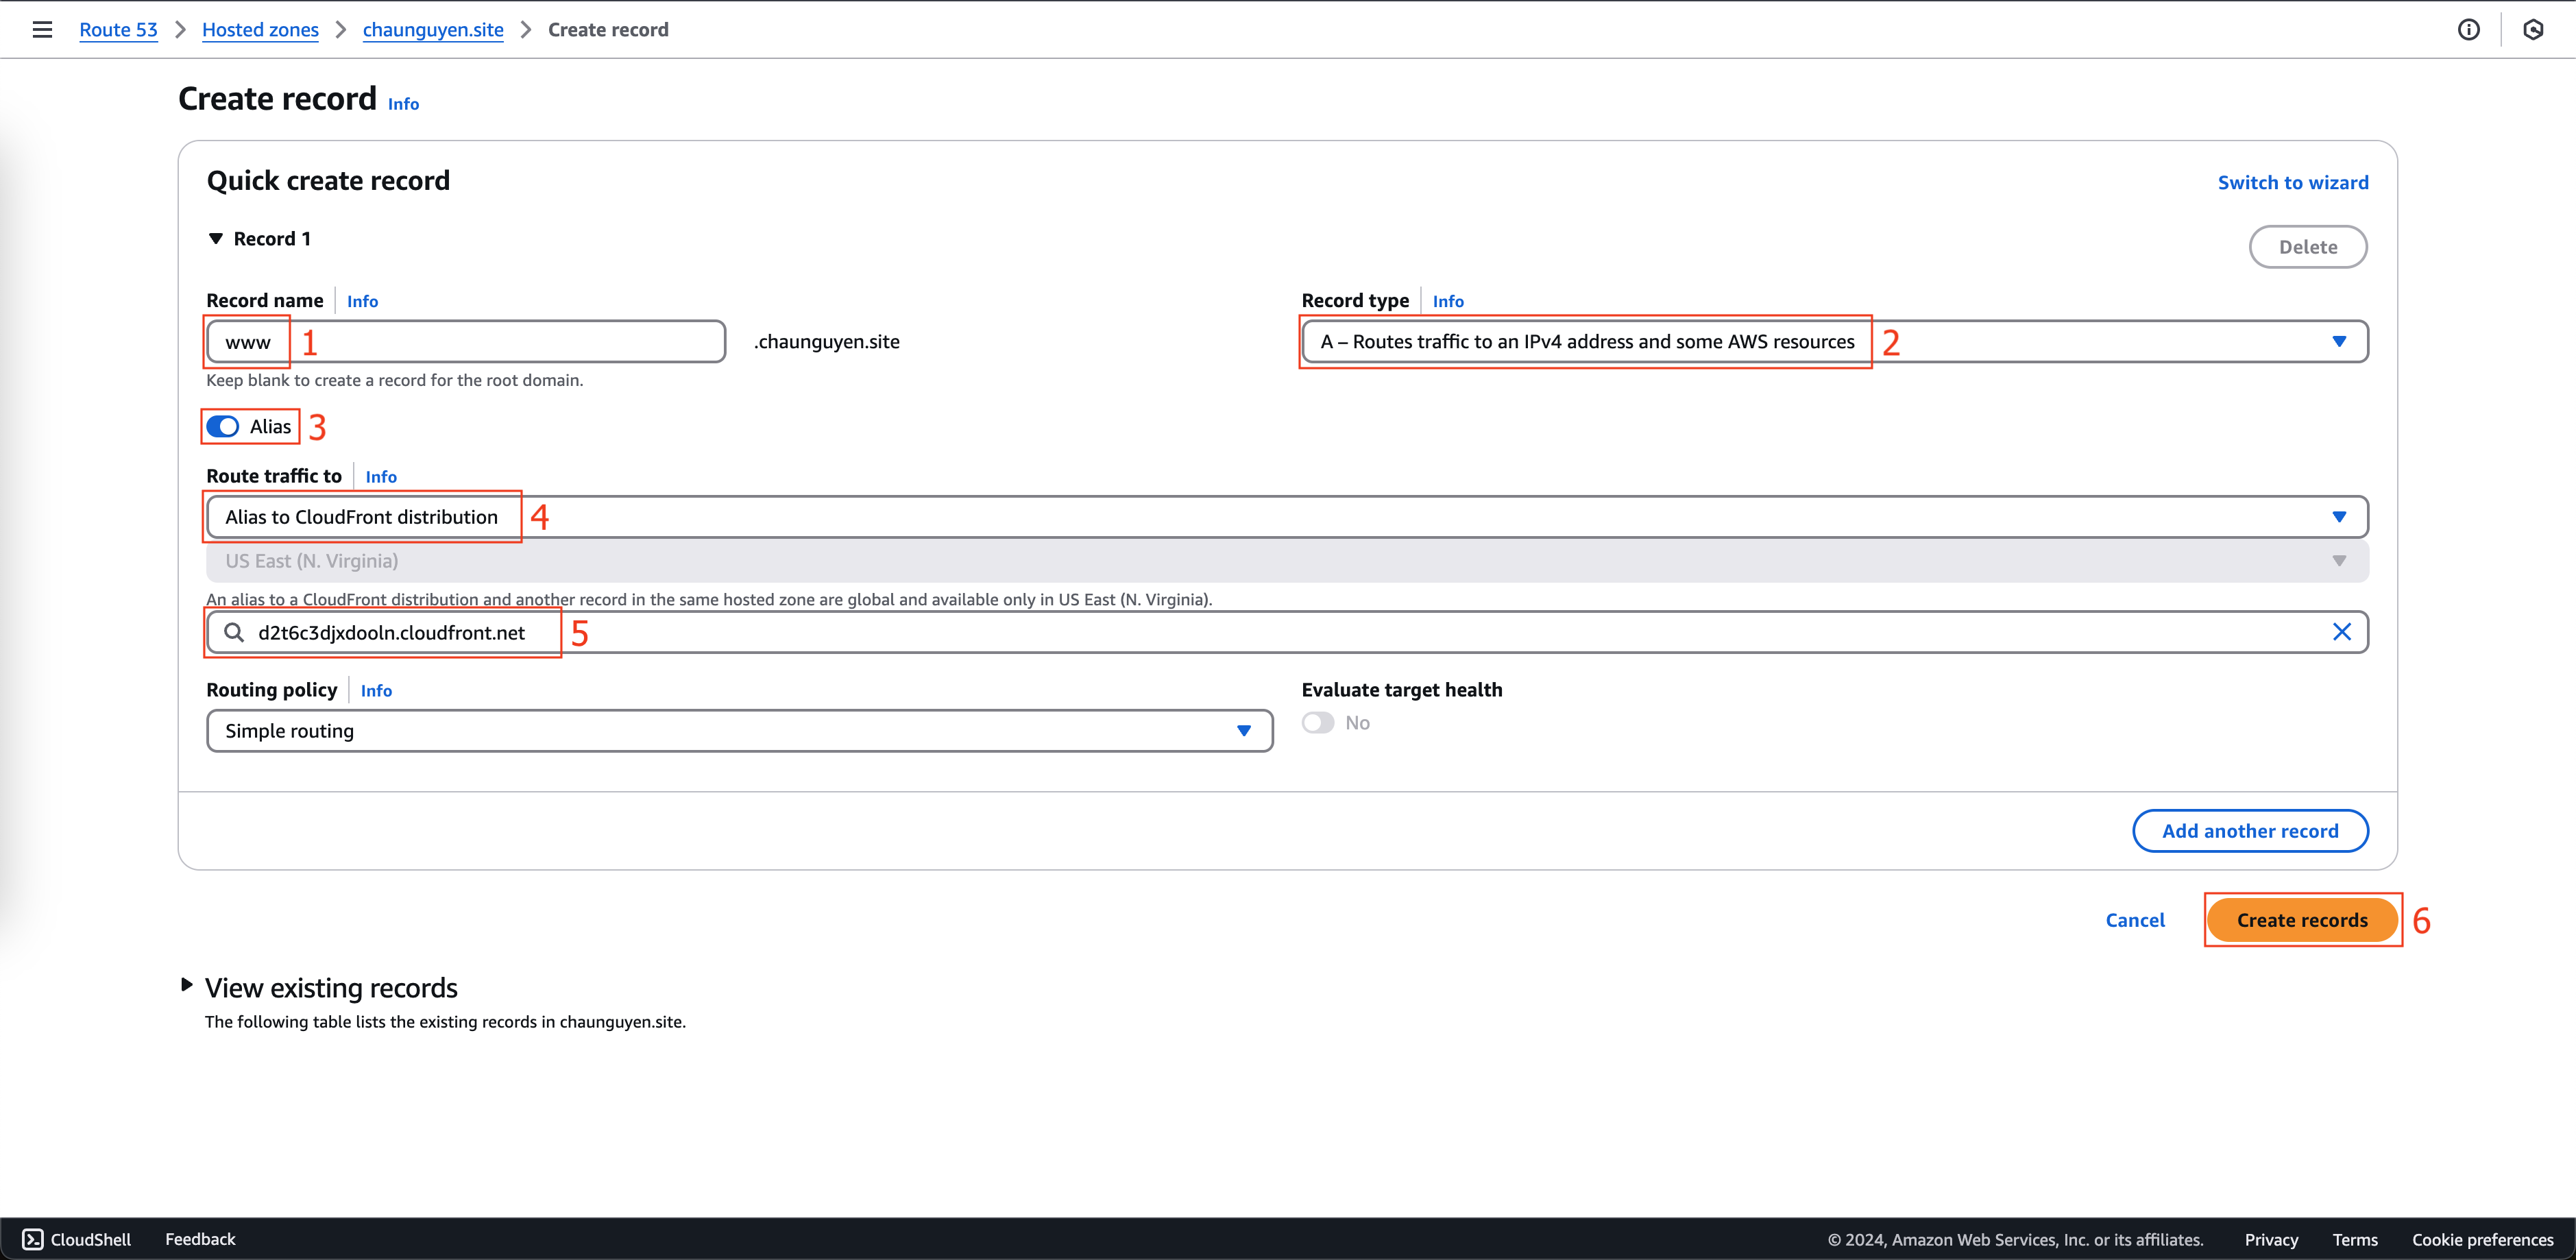
- Tại trang Create record.
- Nhập www tại Record name.
- Chọn A - Routes traffic to an IPv4 … tại Record type.
- Bật Alias.
- Chọn Alias to CloudFront distribution.
- Chọn CloudFront distribution mà bạn đã tạo ở bước trước.
- Click nút Create records.
-
Nhập các đường dẫn sau vào tab mới trong trình duyệt web của bạn:
http://DOMAIN,http://www.DOMAIN, thay thế tất cả DOMAIN bằng tên miền của bạn. Tất cả các đường dẫn này sẽ được chuyển hướng sang đường dẫn mới, thay thế http bằng https