Create CloudFront Distribution
In this step, we will create a CloudFront distribution to serve our website globally with HTTPS, then attach our custom domain and SSL certificate.
Create a CloudFront Distribution
Open Amazon CloudFront console. On the Distributions page, click Create distribution.
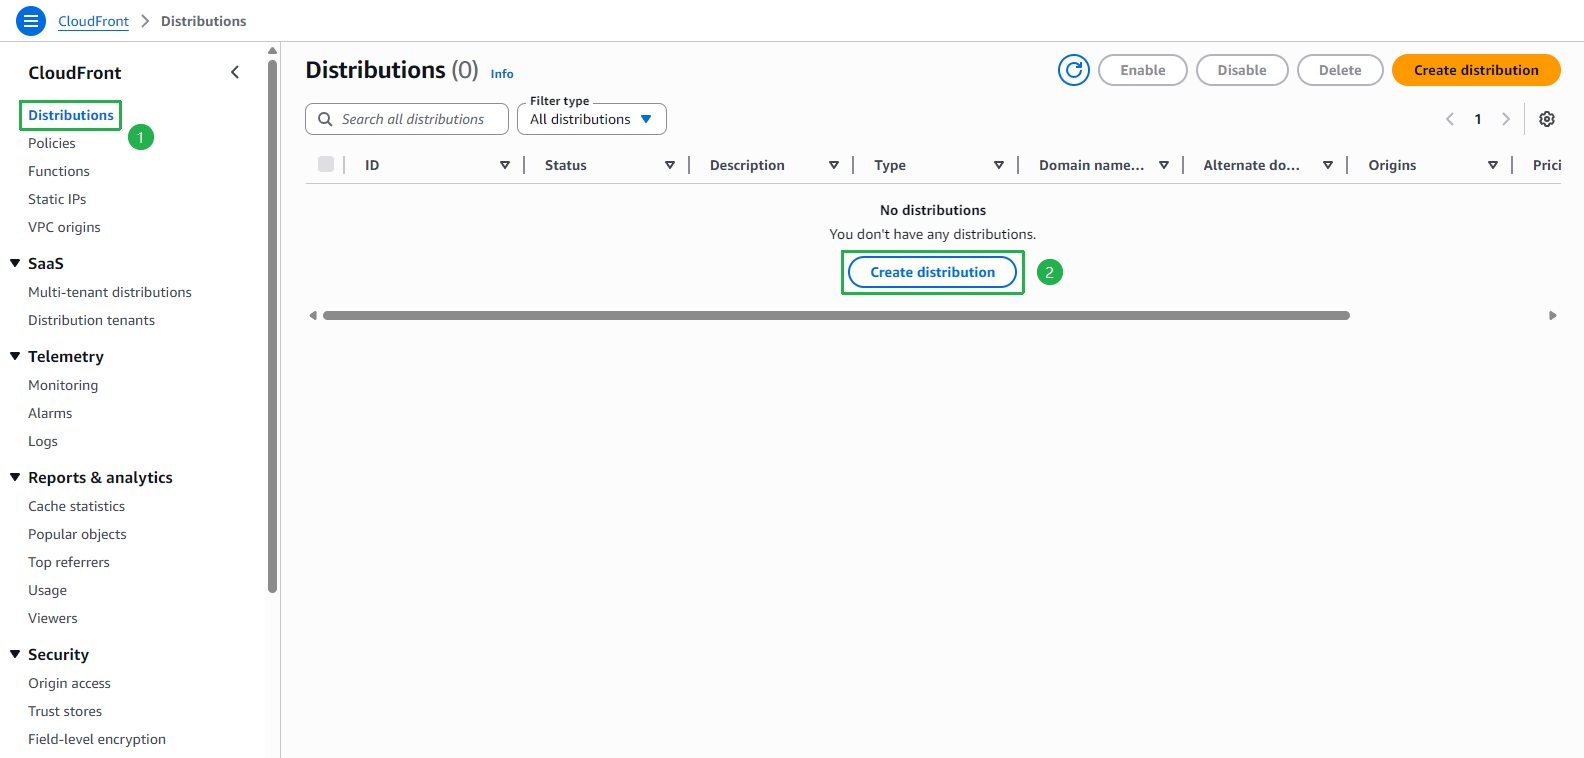
At Step 1 — Choose a plan, select the Free plan ($0/month). This is sufficient for learning and development purposes.
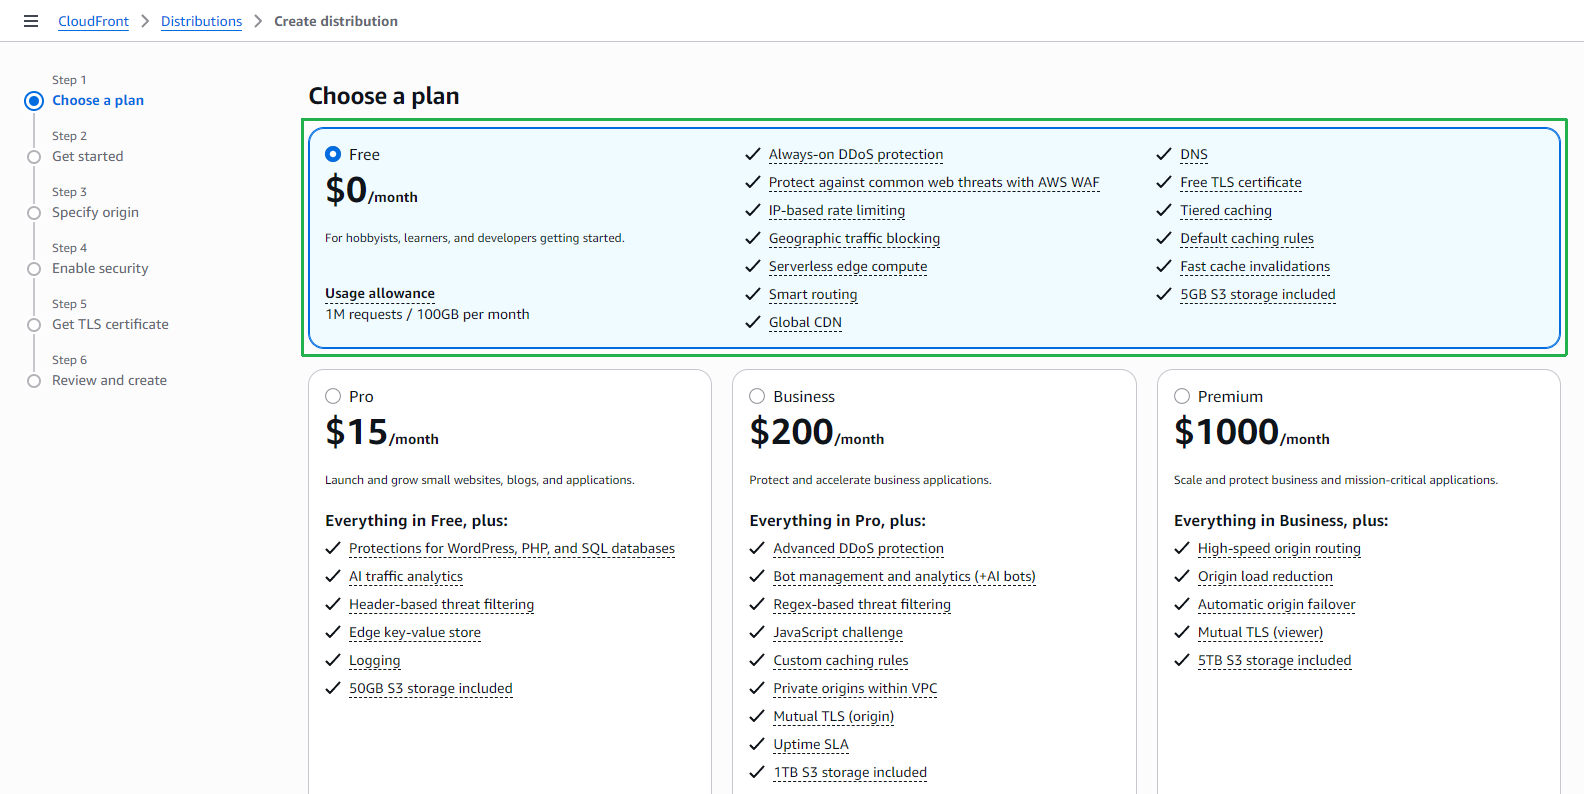
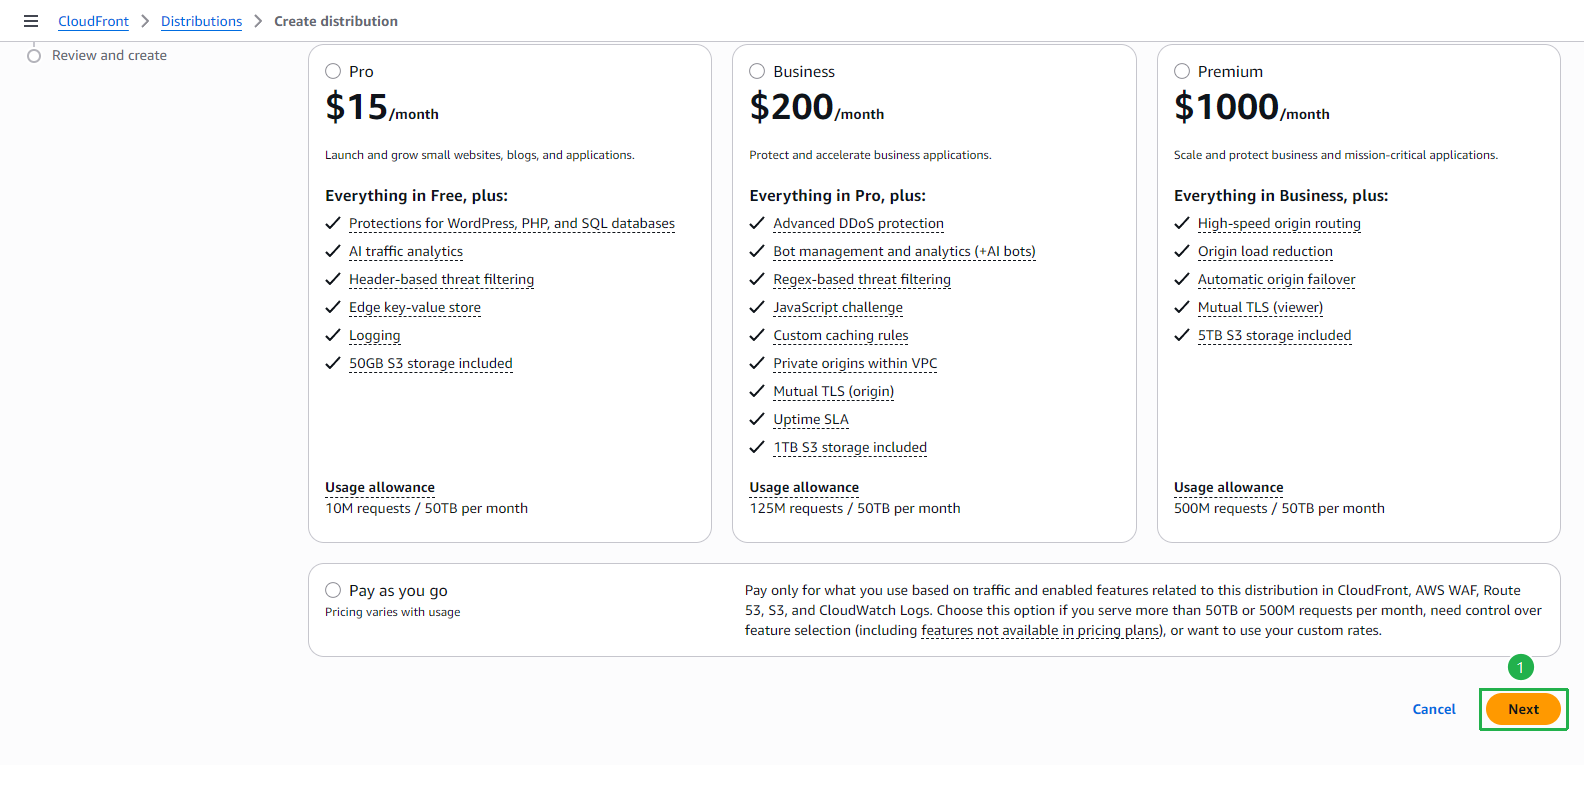
Scroll down to view other plan options (Pro, Business, Premium). Keep Free selected and click Next.
At Step 2 — Get started:
- Enter a Distribution name (e.g.,
FCAJ Book Shop Distribution). - Keep Distribution type as Single website or app.
- Skip the Domain section for now (we will add it later).
- Click Next.
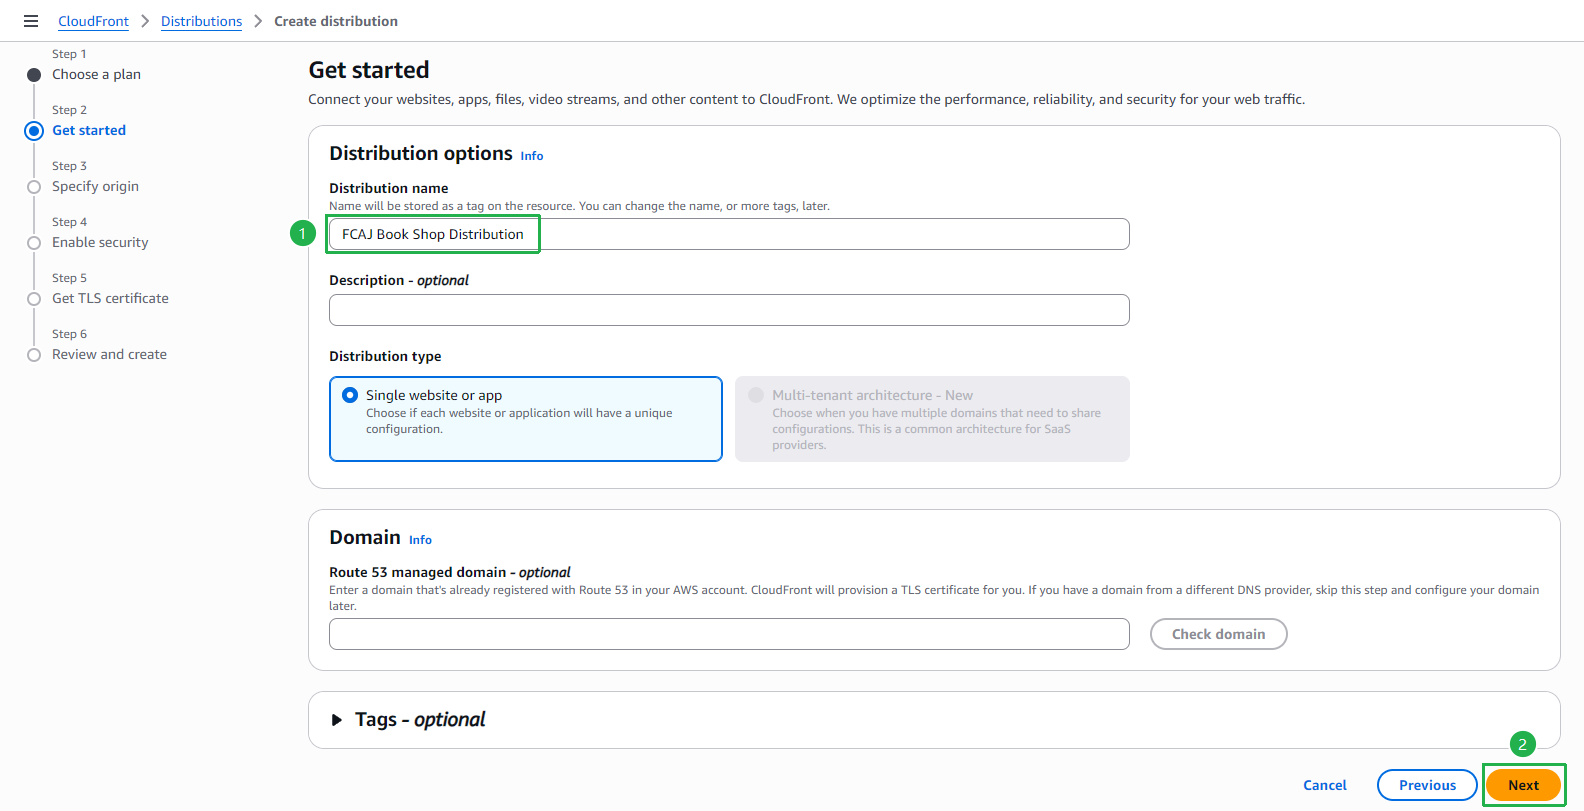
- Enter a Distribution name (e.g.,
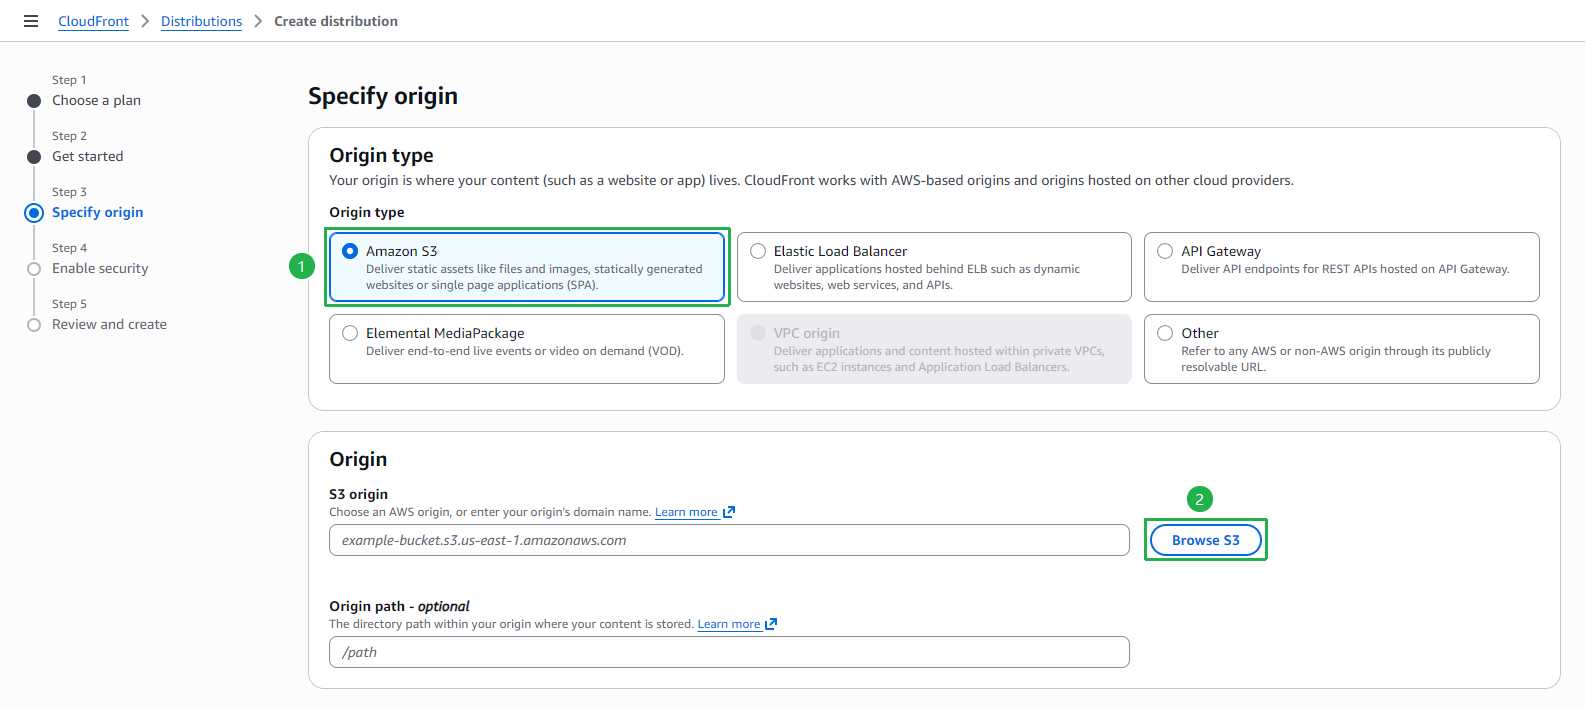
At Step 3 — Specify origin:
- Select Amazon S3 as the Origin type.
- Click Browse S3 to find your S3 bucket.
In the Select S3 location popup:
- Search and select your S3 bucket (e.g.,
fcaj-book-shop-by-tranvix). - Click Choose.
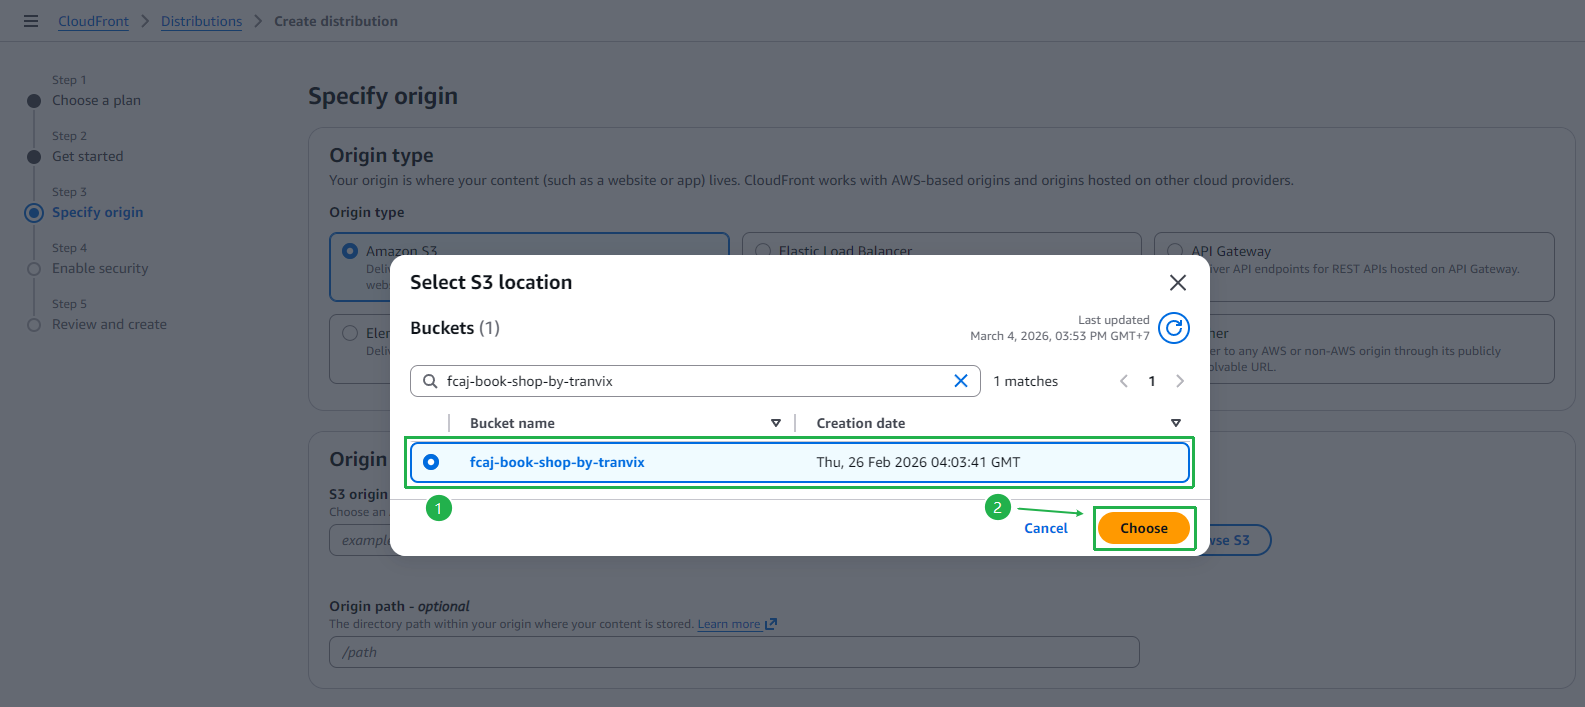
- Search and select your S3 bucket (e.g.,
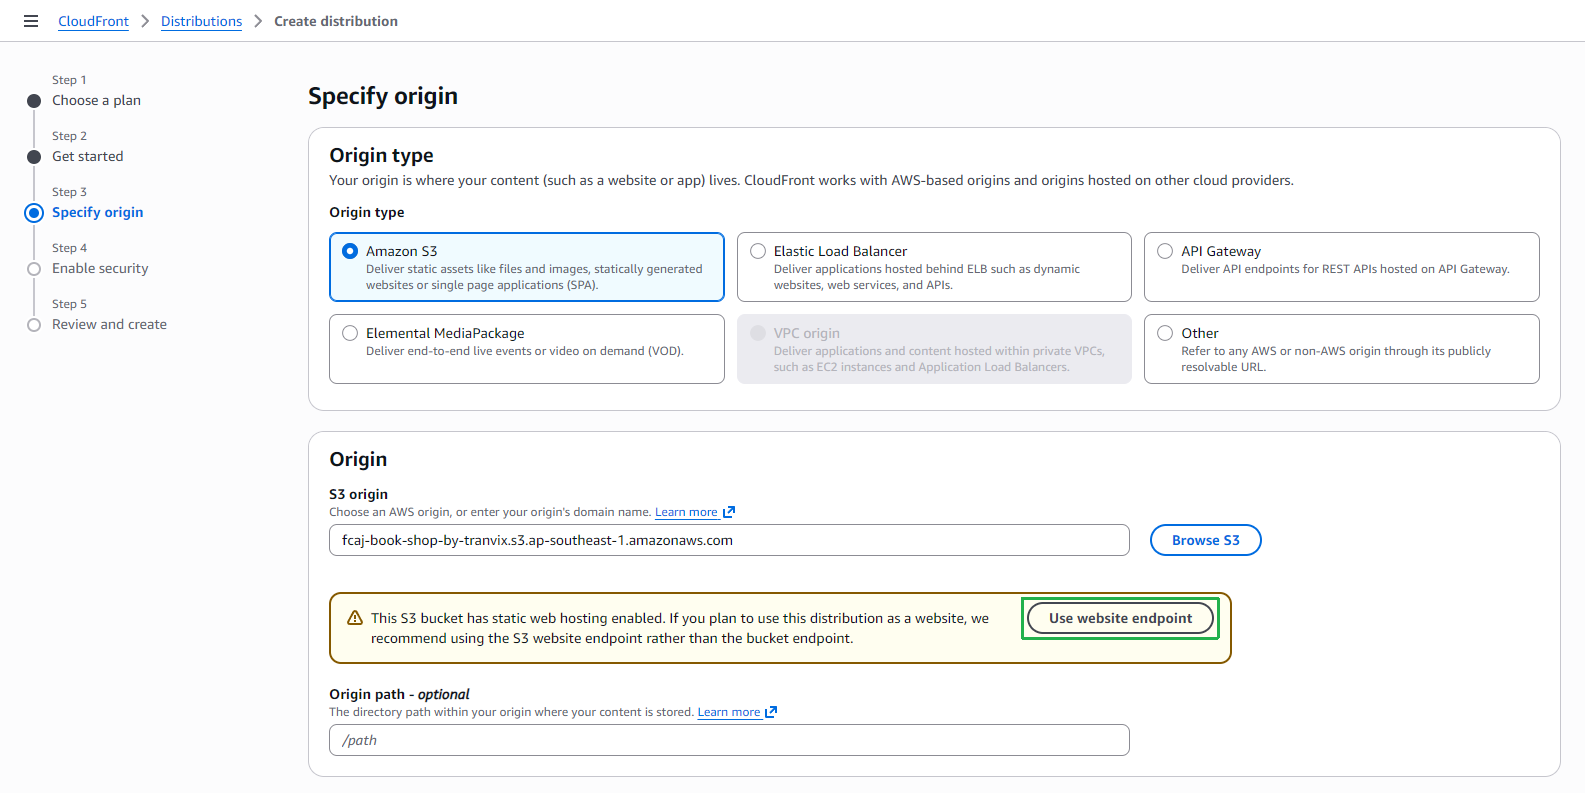
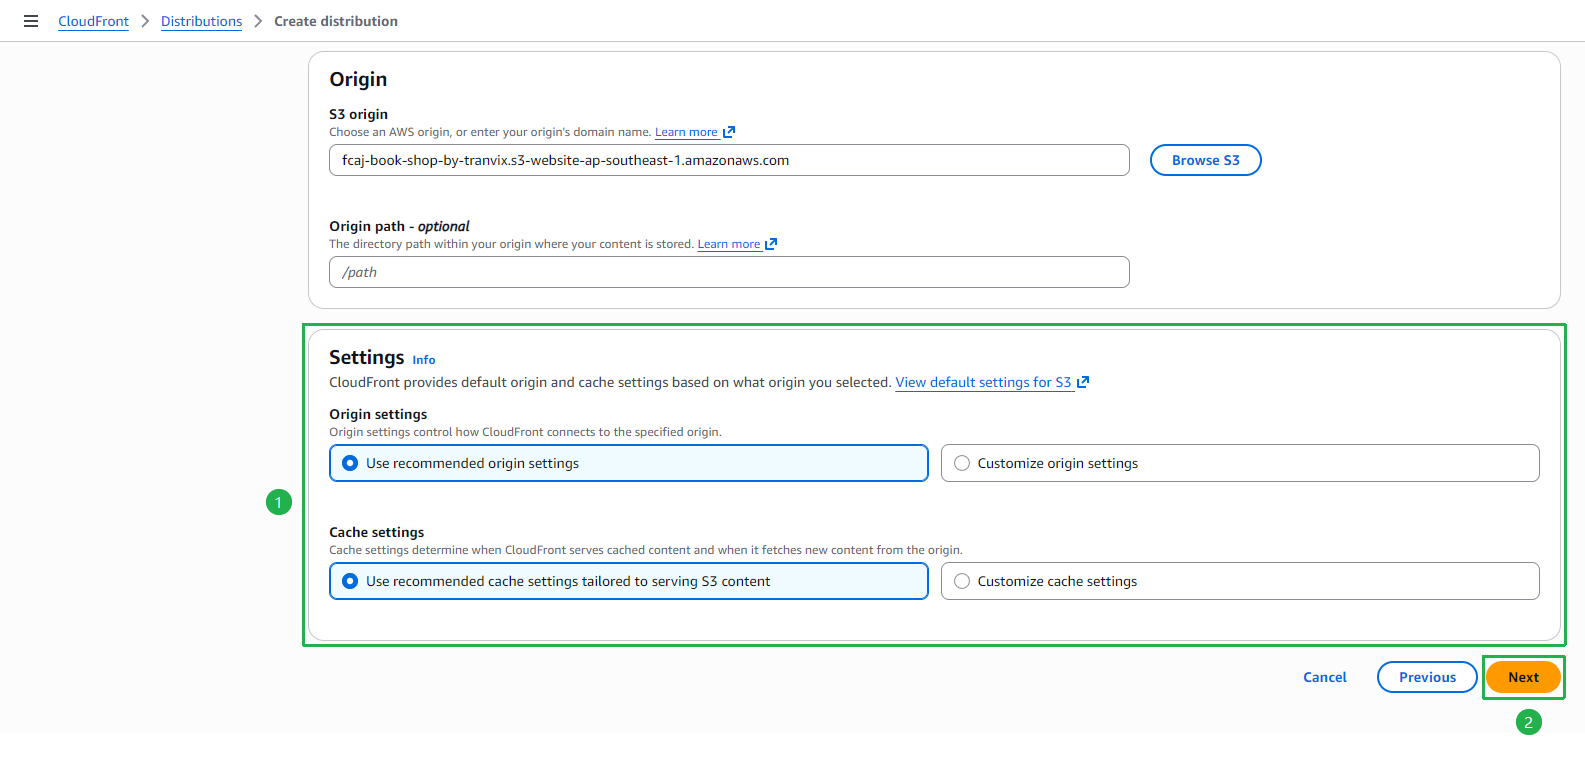
After selecting the bucket, a warning will appear: “This S3 bucket has static web hosting enabled.” Click Use website endpoint to use the S3 website endpoint instead of the bucket endpoint.
The S3 origin field is now updated with the S3 website endpoint URL (e.g.,
fcaj-book-shop-by-tranvix.s3-website-ap-southeast-1.amazonaws.com).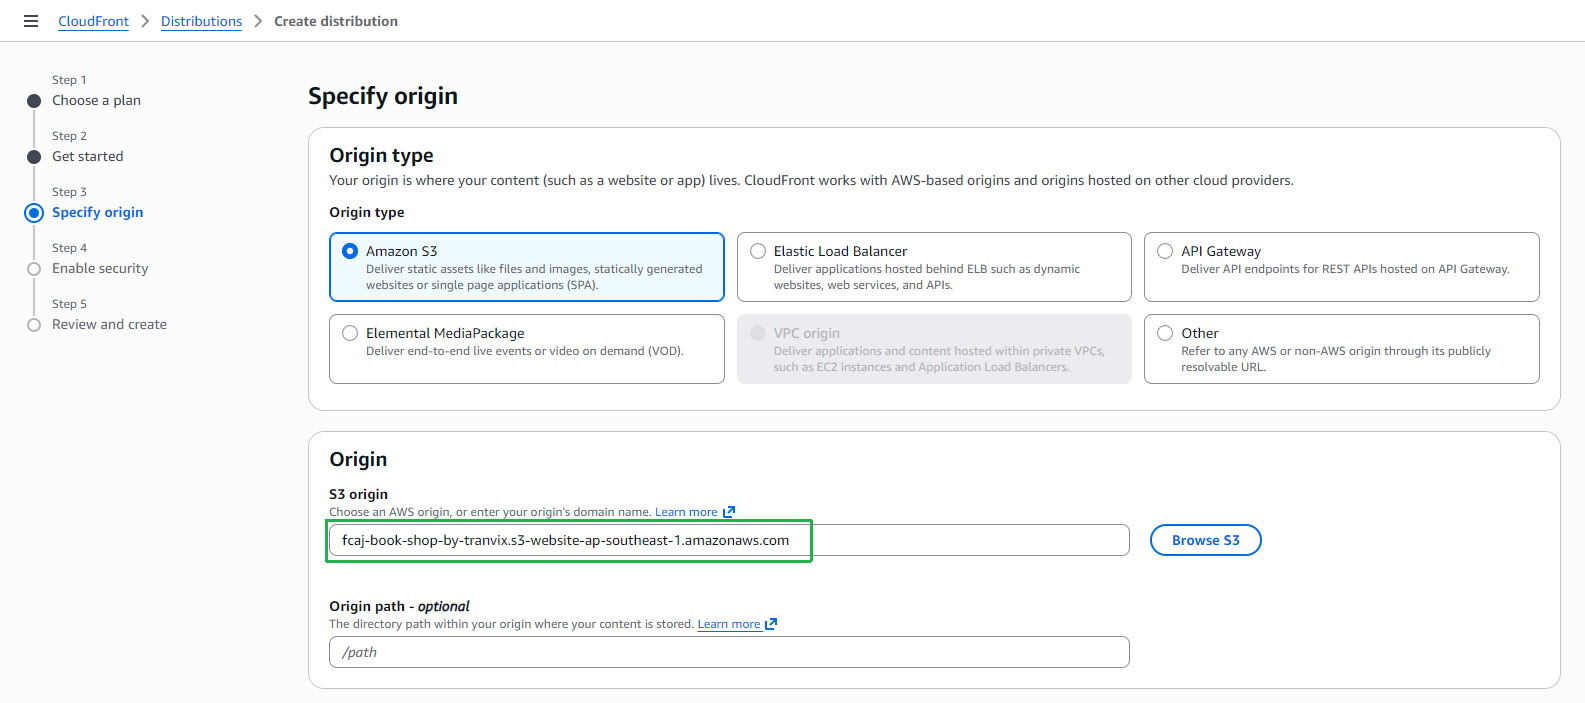
Scroll down to the Settings section:
- Keep Use recommended origin settings selected.
- Keep Use recommended cache settings tailored to serving S3 content selected.
- Click Next.
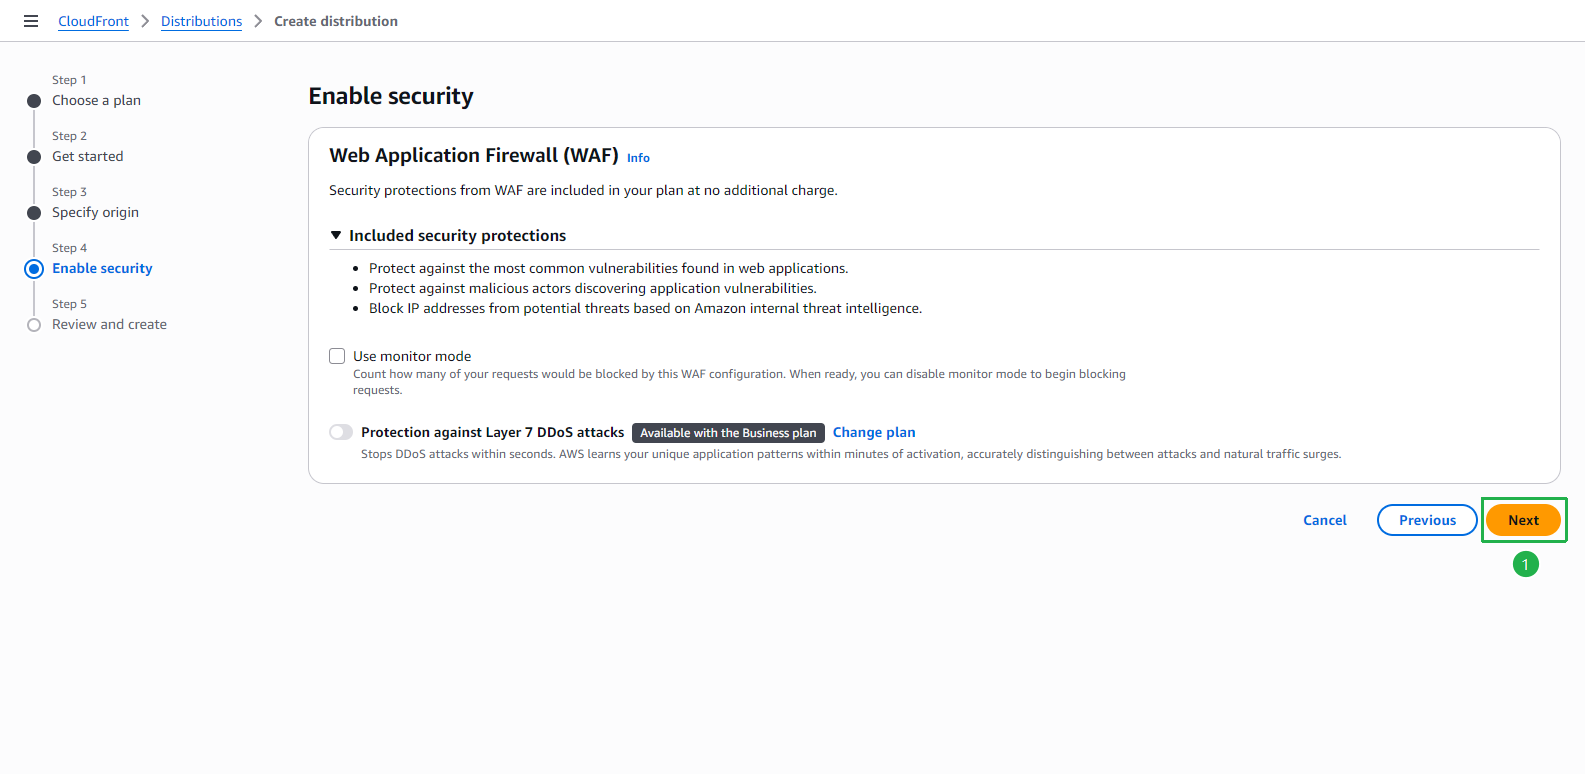
At Step 4 — Enable security:
- The Web Application Firewall (WAF) security protections are included free with your plan.
- Keep the default settings.
- Click Next.
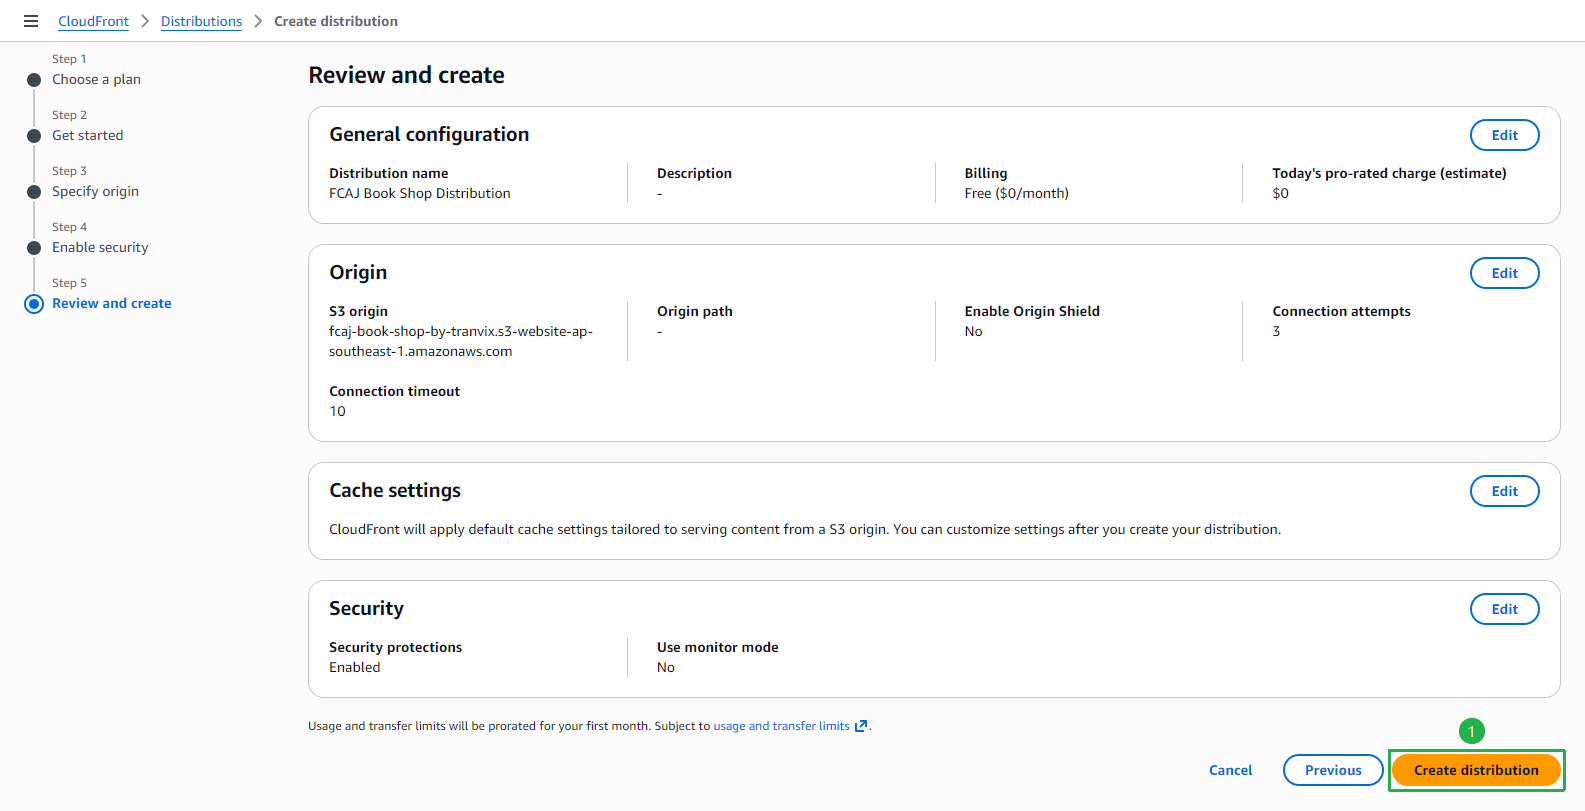
At Step 5 — Review and create, review all your settings:
- General configuration: Distribution name, Free plan.
- Origin: S3 website endpoint.
- Cache settings: Default S3 settings.
- Security: Enabled.
- Click Create distribution.
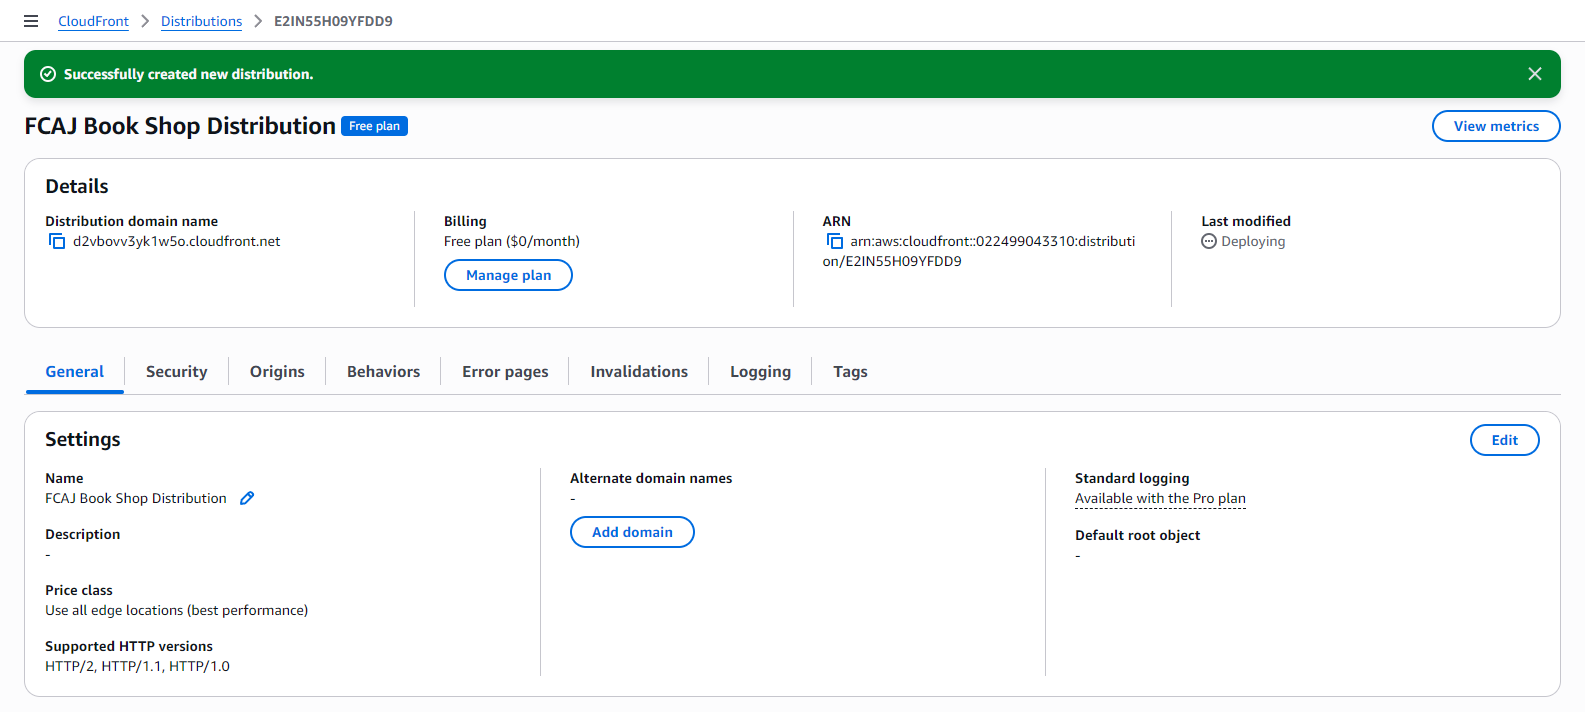
The distribution is created successfully! A green banner confirms “Successfully created new distribution.” The status will show Deploying — wait for it to finish.
Add Custom Domain and SSL Certificate
Once the distribution is deployed, navigate to the General tab in the distribution details. In the Settings section, click Add domain under Alternate domain names.
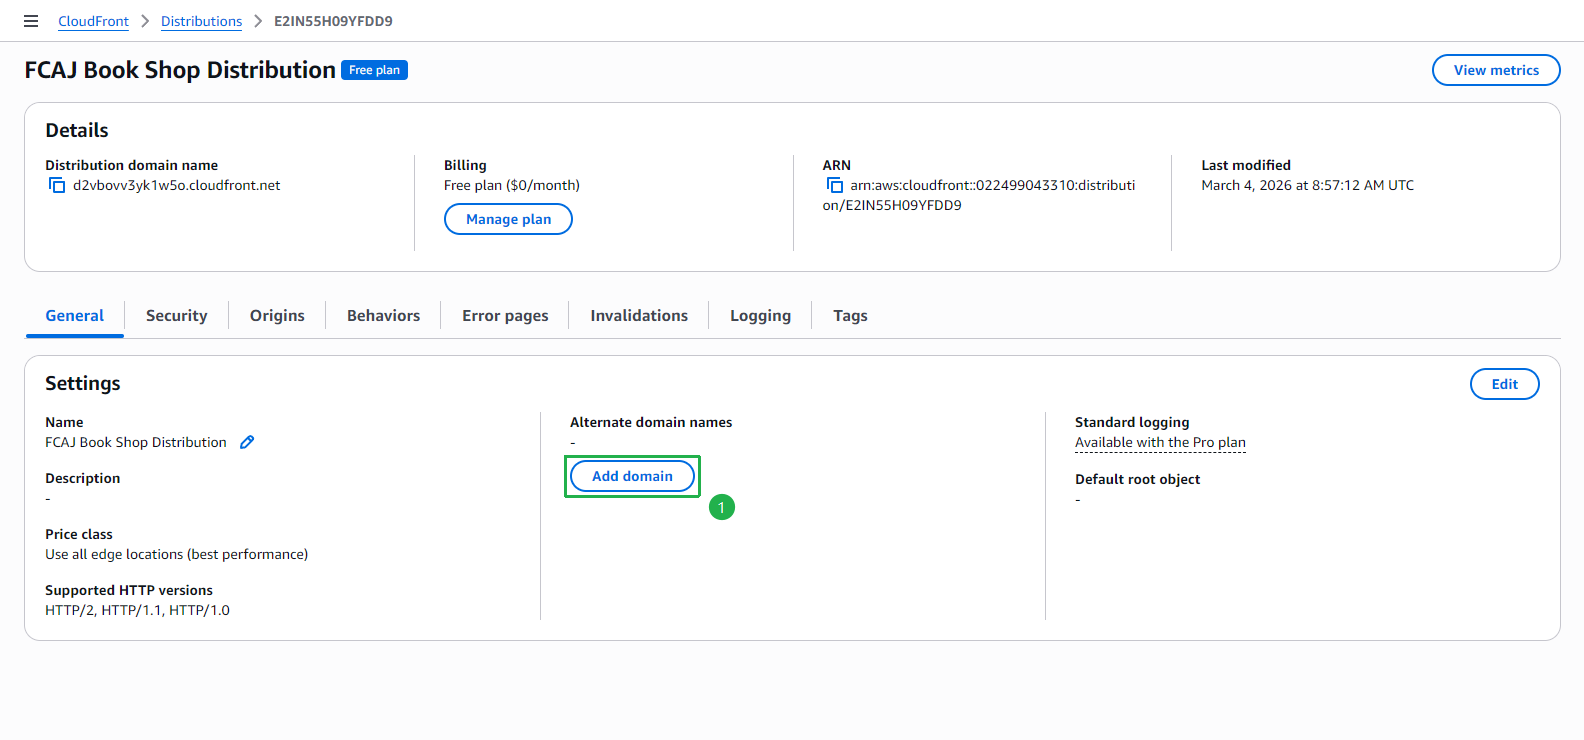
At Step 1 — Configure domains:
- Enter your root domain (e.g.,
tranvix.click). - Click Add another domain and enter the
wwwsubdomain (e.g.,www.tranvix.click). - Click Next.
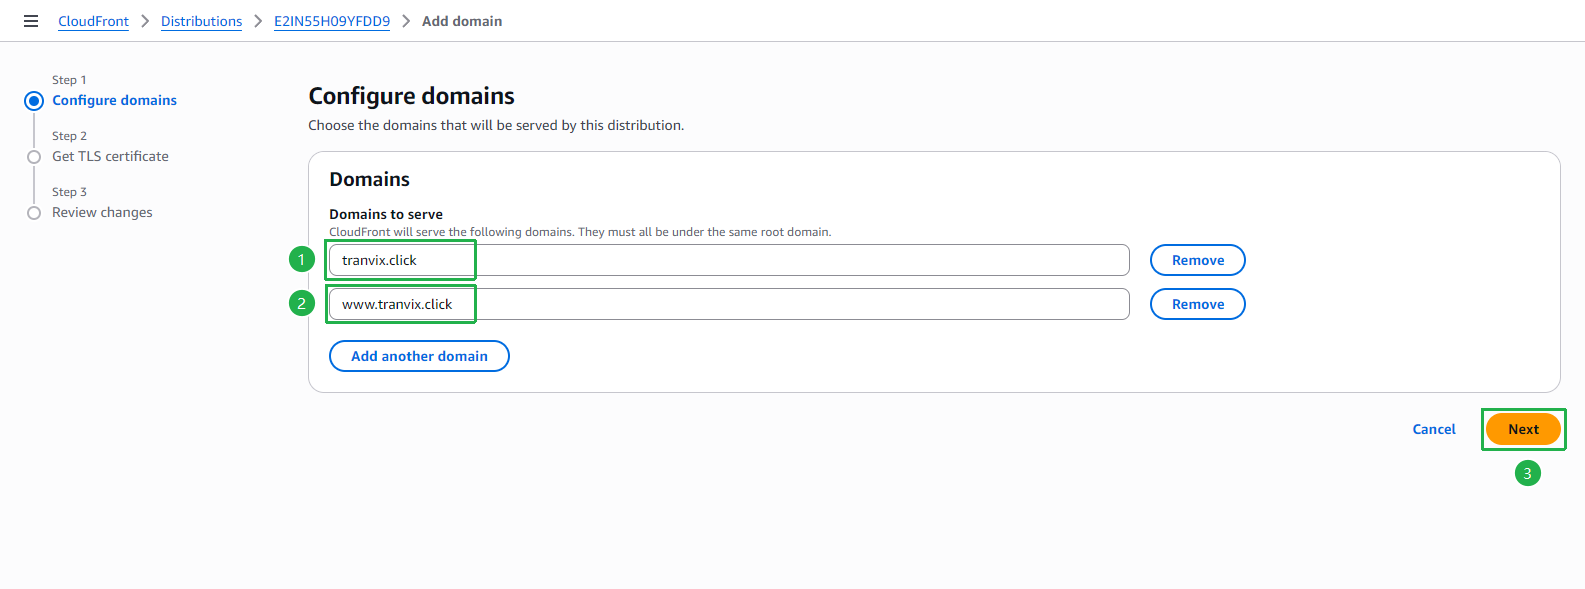
- Enter your root domain (e.g.,
At Step 2 — Get TLS certificate:
- Select the SSL certificate you created in Section 3 (e.g.,
*.tranvix.click). - The Certificate details section shows the ARN and covered domains.
- Click Next.
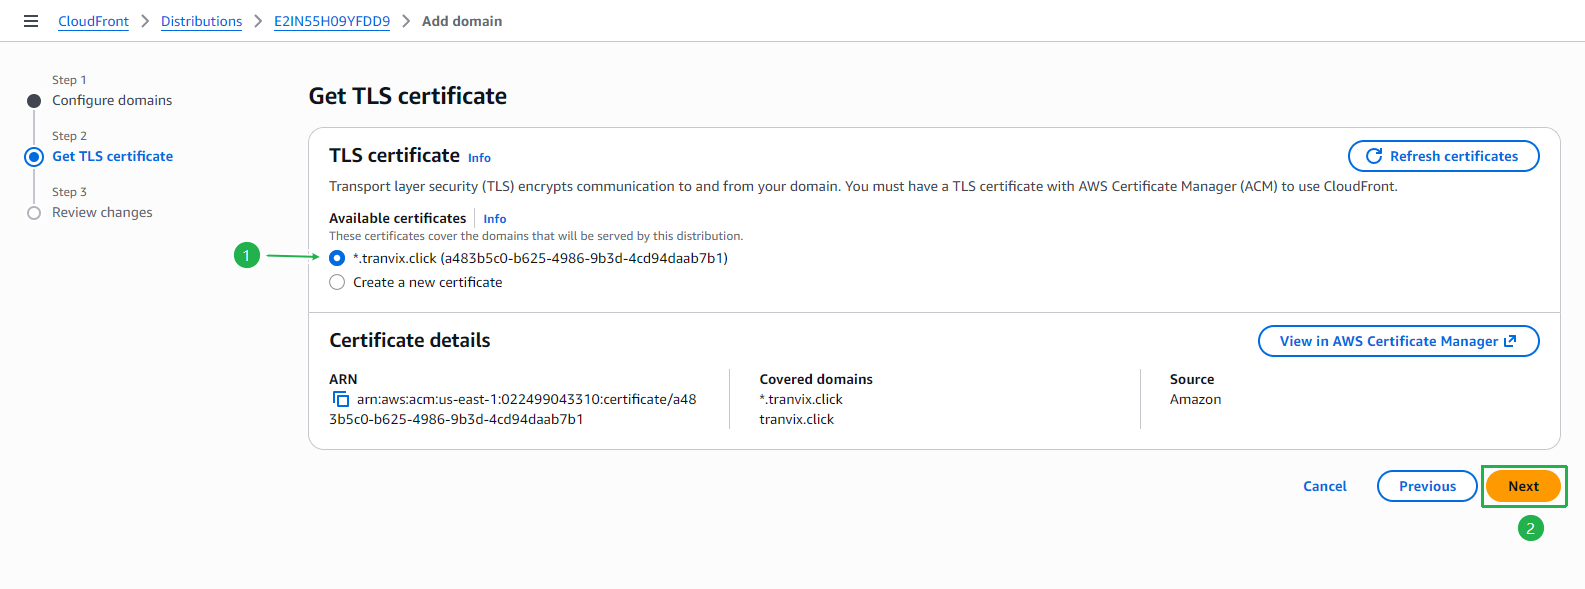
- Select the SSL certificate you created in Section 3 (e.g.,
At Step 3 — Review changes, verify:
- Domains to serve:
tranvix.clickandwww.tranvix.click. - TLS certificate: Your ACM certificate.
- Click Add domains.
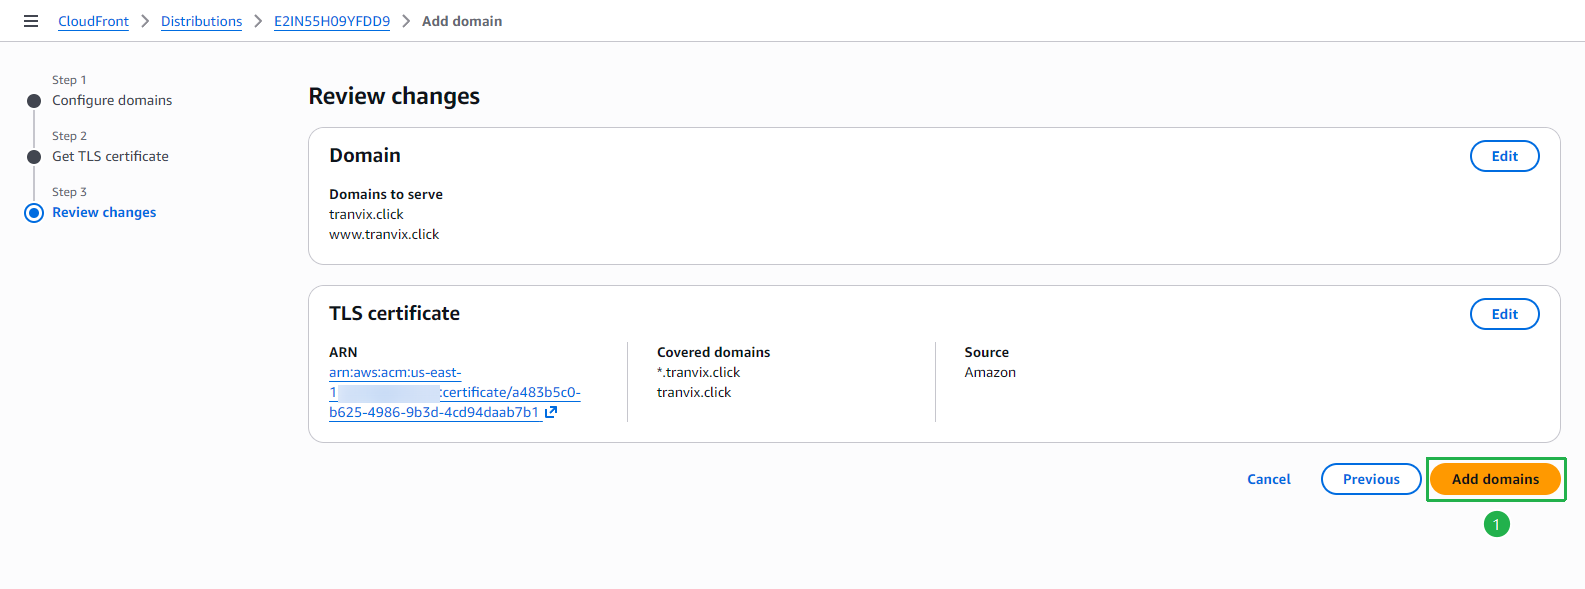
- Domains to serve:
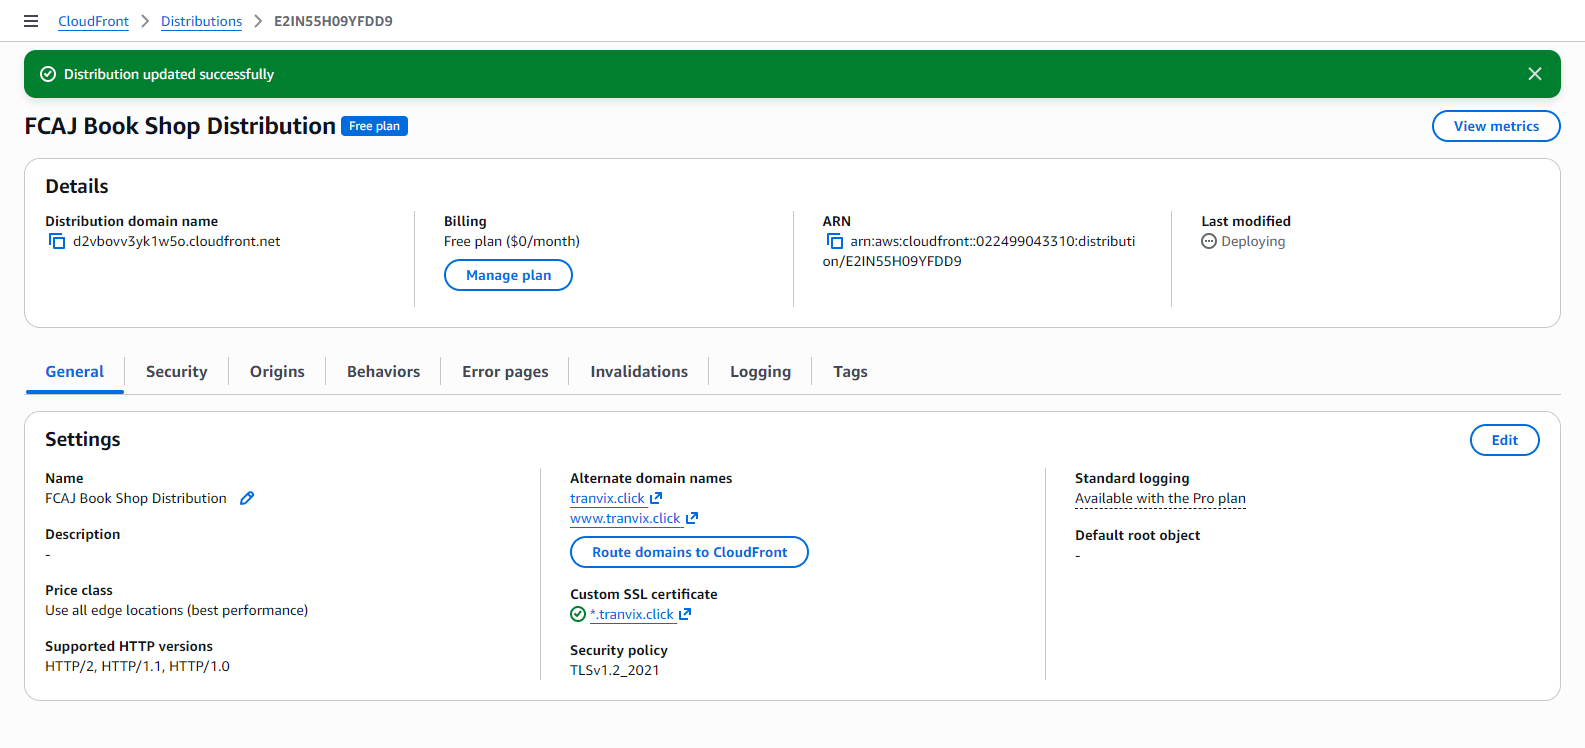
The distribution is updated successfully! A green banner confirms “Distribution updated successfully.” You can now see both alternate domain names and the Custom SSL certificate in the Settings section.
Set Up DNS Routing to CloudFront
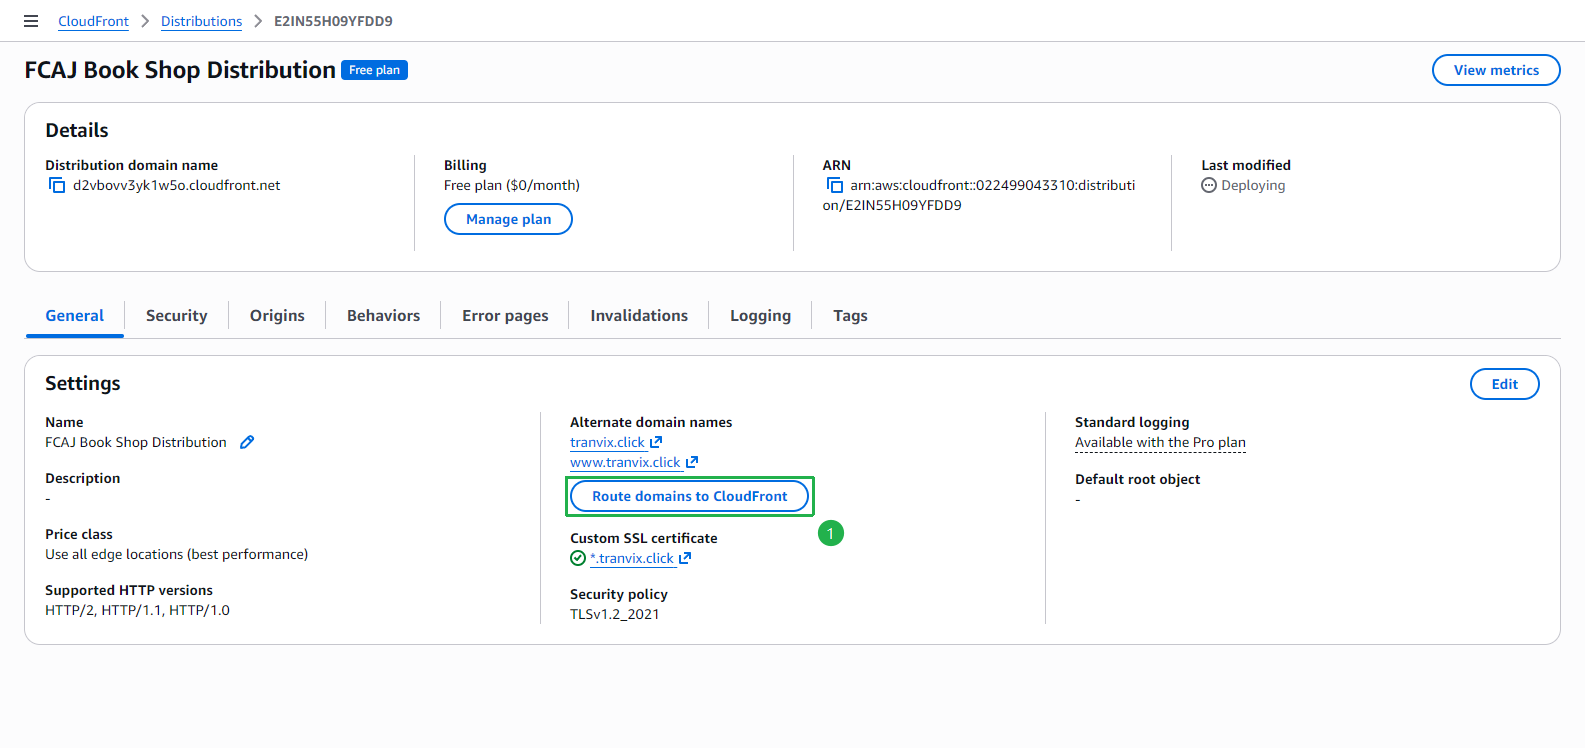
In the Settings section of the distribution, click Route domains to CloudFront to automatically create Route 53 DNS records.
In the Set up DNS routing popup, you will see 4 DNS records to be created (A and AAAA for both
tranvix.clickandwww.tranvix.click), all pointing to the CloudFront distribution domain. Click Set up routing automatically.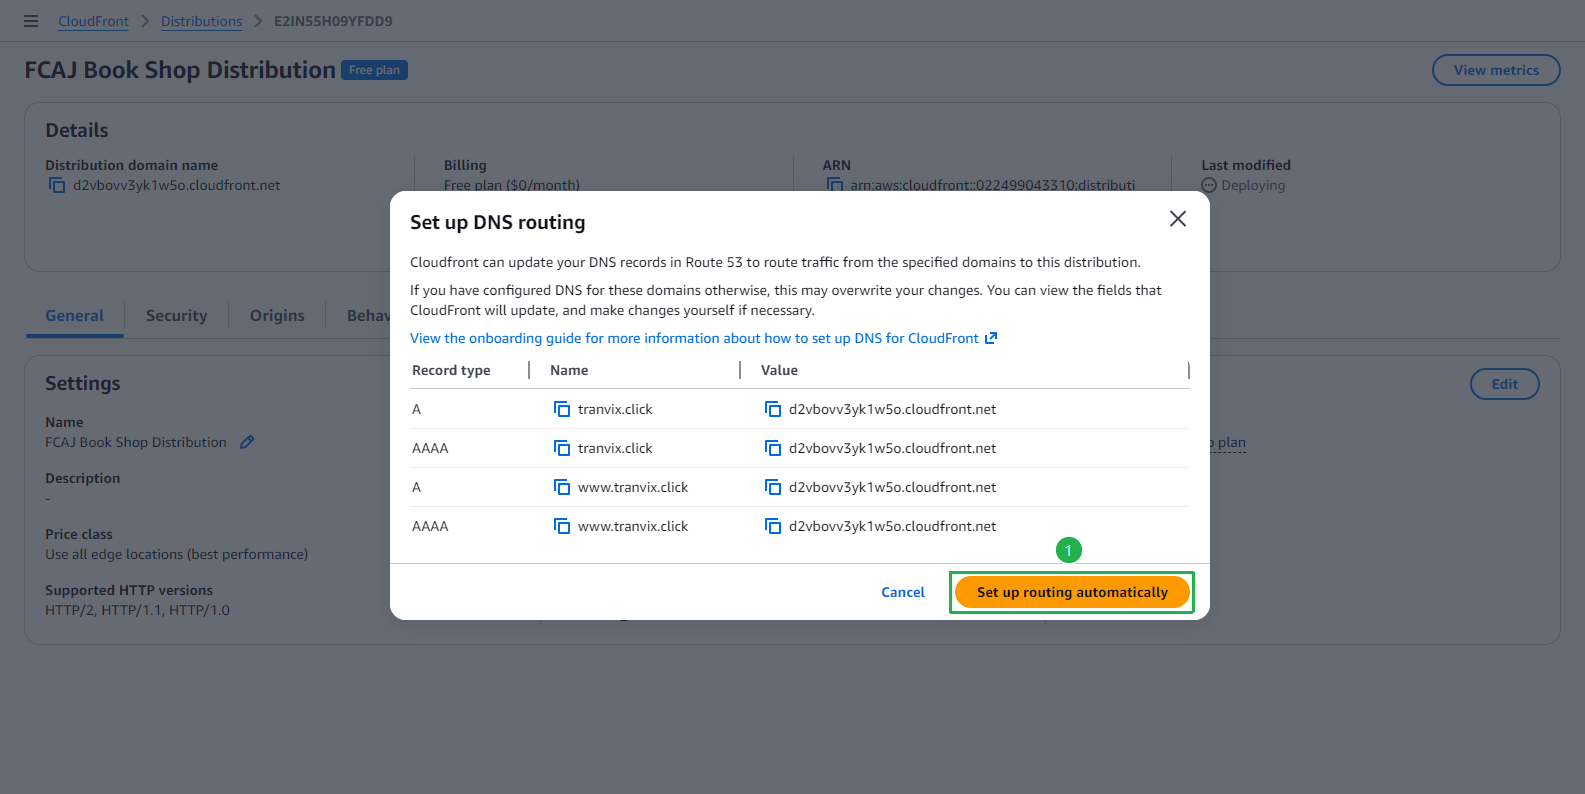
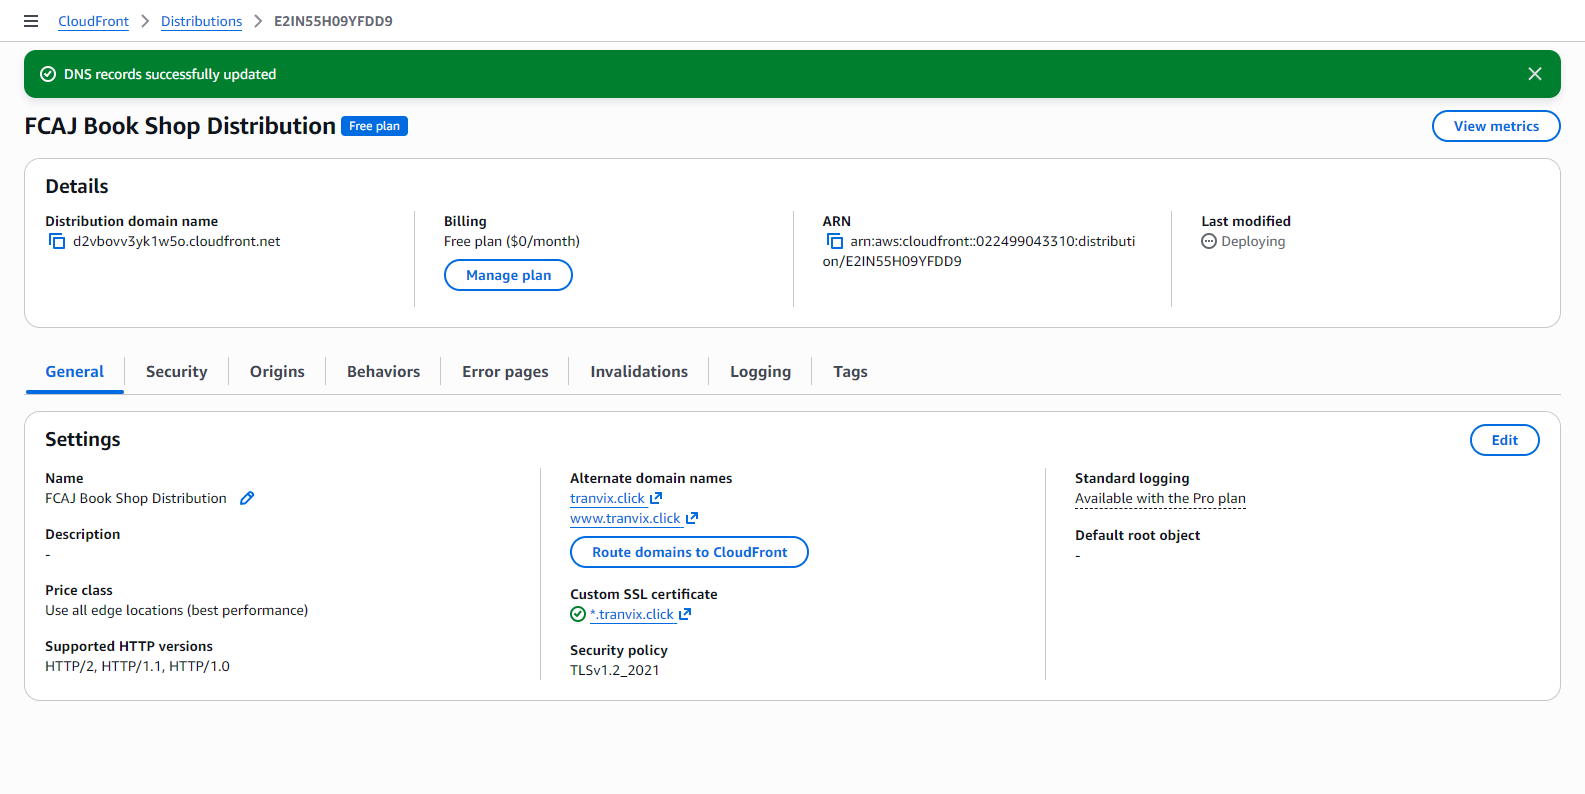
A green banner confirms “DNS records successfully updated.”
Verify in Route 53: Navigate to your hosted zone and confirm that 4 new A/AAAA alias records have been created, pointing
tranvix.clickandwww.tranvix.clickto the CloudFront distribution.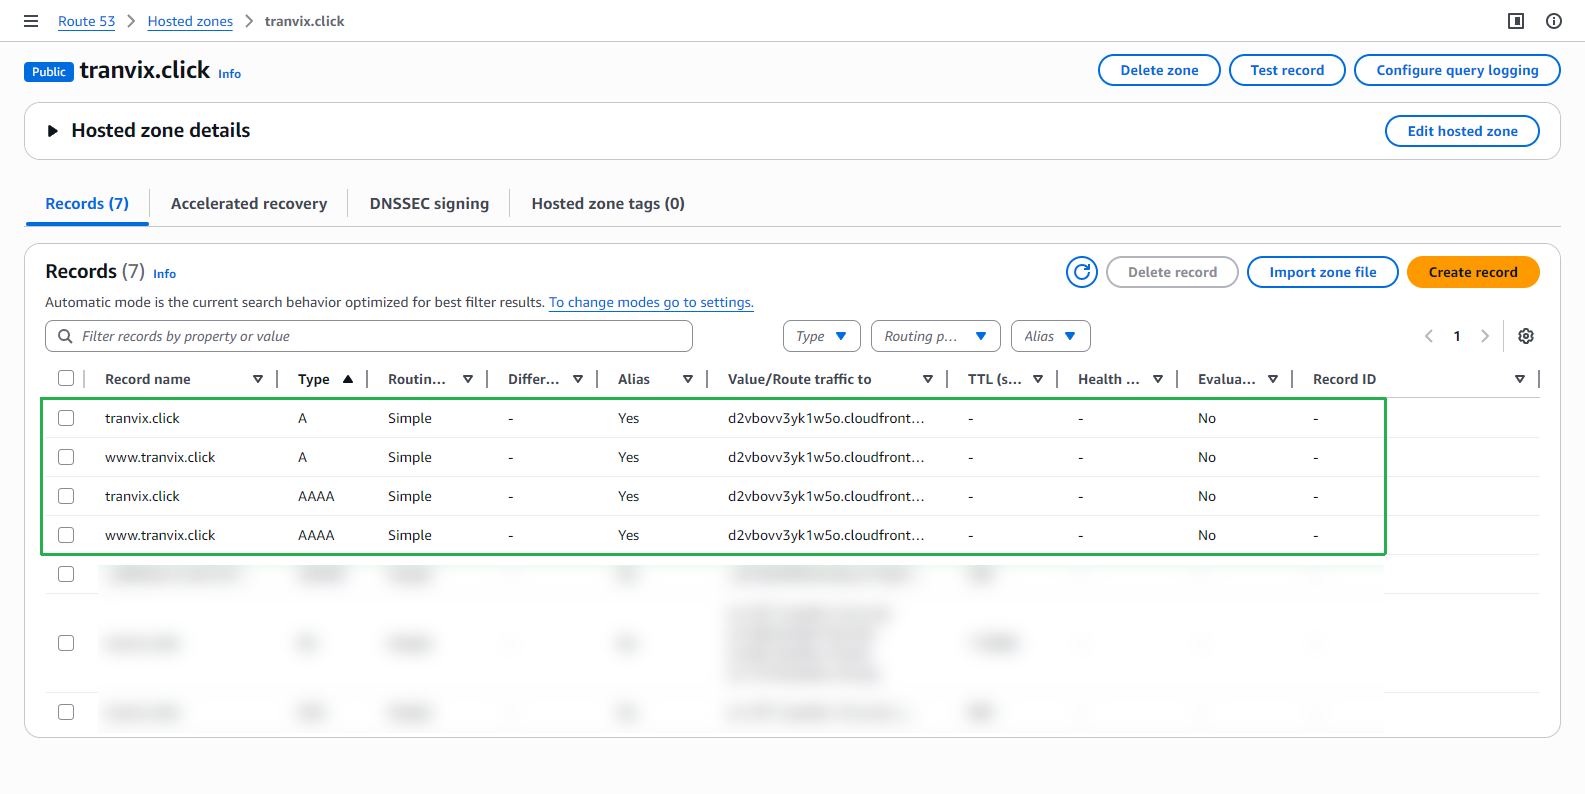
Verify the Website
Open a new browser tab and navigate to your domain (e.g.,
https://tranvix.click). The FCJ Book Store website should load successfully with HTTPS enabled.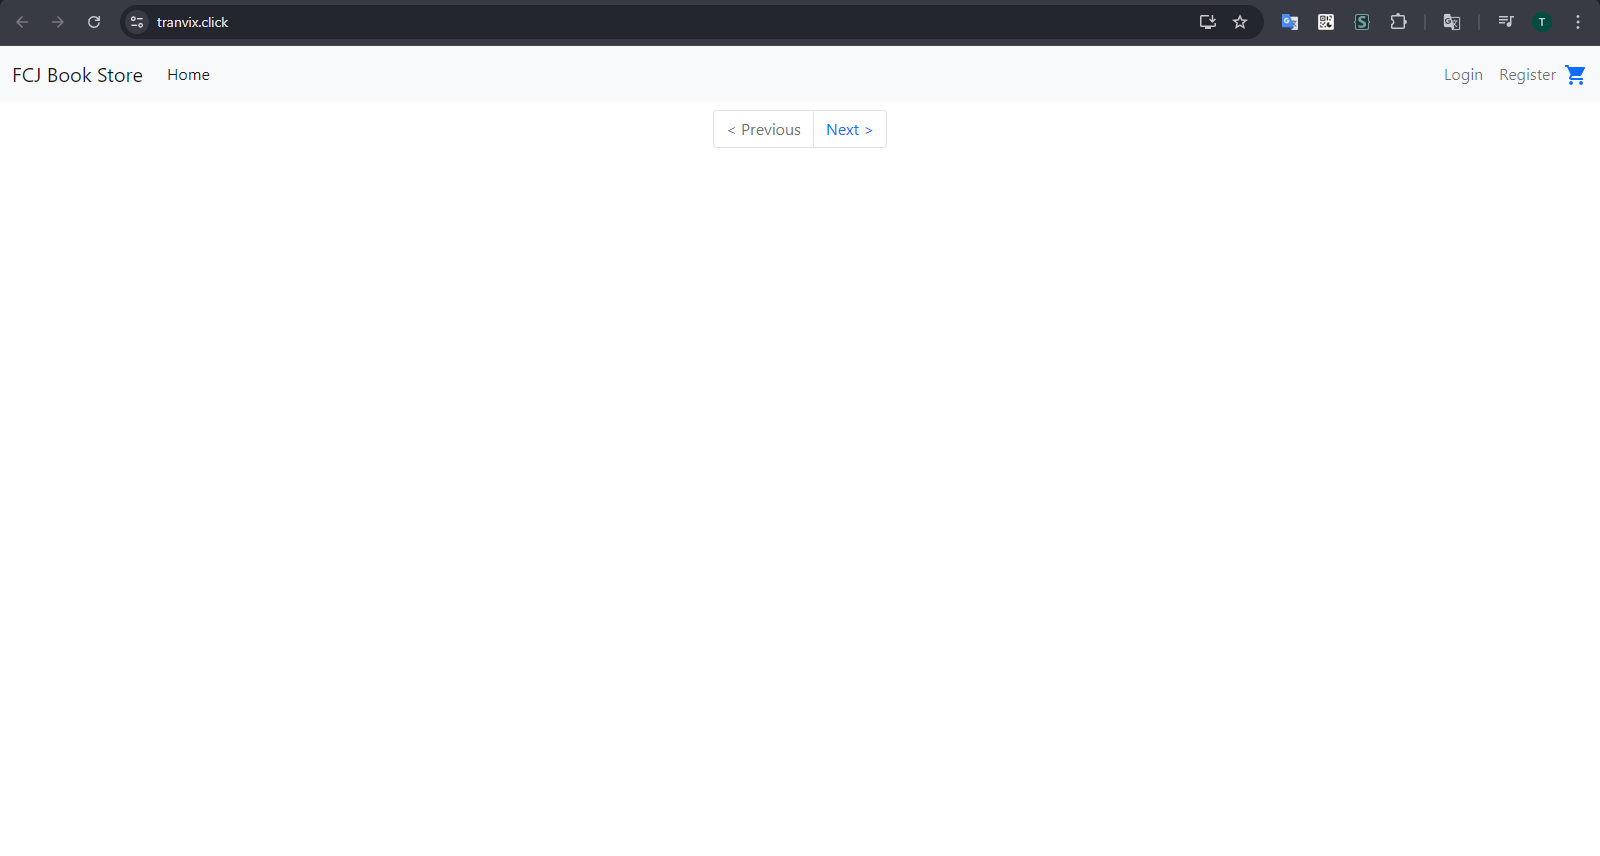
DNS propagation may take a few minutes. If the domain does not resolve immediately, wait 5–10 minutes and try again. You can also test with https://www.tranvix.click.
Congratulations! Your website is now served globally through CloudFront with HTTPS enabled via your custom domain. In the next step, we will learn how to clean up all resources.